
Propagation
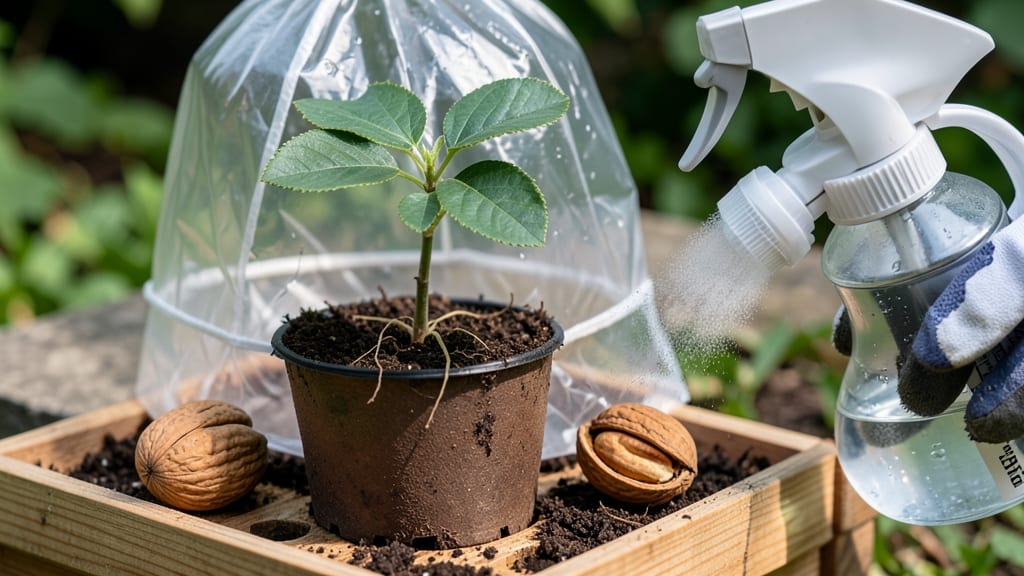
Starting a pecan tree from a nut is easier than you think—especially when you know the 90% success trick. 🌱 I cracked the code after years of failed attempts: fresh nuts, cold stratification, and a little patience.
The secret isn’t complicated, but skipping steps will leave you waiting forever for that first sprout.
You’ll need healthy pecans (harvested fresh or stored properly), a plastic bag with moist sand, and a sunny spot for planting. The process mimics nature’s way—pecans need a winter chill to break dormancy, so we give them a head start indoors.
Most gardeners overlook this step, which is why their nuts rot instead of sprout.
By spring, you’ll have sturdy seedlings ready to plant outdoors. These young trees grow slowly at first but reward you with strong roots and eventual shade—imagine harvesting your own pecans in 10-15 years. The key is consistency: keep the soil moist but not soggy, and protect them from late frosts.
Works for backyard orchards, container growing (with large pots), or even as a gift tree. Here’s how to avoid the pitfalls that trip up beginners—like overwatering or planting too deep—and set your pecan on the path to success.
📚 In This Guide
- What you need
- Instructions
- Tips and common mistakes
- Wrapping up and next steps
What you need
- ● Fresh pecan nuts: 3–5 high-quality, disease-free nuts (harvested in fall, preferably from a local source). Avoid store-bought nuts—they’re often treated to prevent sprouting!
- ● Potting mix: 1–2 bags of well-draining, sterile seed-starting mix or a 50/50 blend of peat moss and perlite (avoid garden soil—it can harbor pathogens).
- ● Containers: Small pots (4–6 inches deep) with drainage holes for germination.
- ● Larger pots (10+ inches) or a nursery bed for seedlings (once roots develop).
- ● Watering can or spray bottle: For gentle, even moisture without over-saturating.
- ● Plastic wrap or humidity dome: To maintain high humidity during germination.
- ● Fertilizer: A balanced, water-soluble fertilizer (e.g., 10-10-10) for seedlings (use sparingly—young trees are sensitive!).
- ● Pruning shears: Small, sharp pair for trimming sprouts or roots if needed.
- ○ Thermometer (optional but helpful): To monitor soil temperature (ideal range: 70–85°F for germination).
- ● Patience: Pecan nuts can take 4–12 weeks (or longer!) to germinate—consistency is key!
- ● Warmth: A sunny windowsill, greenhouse, or indoor grow light (pecans need warmth to sprout).
- ● Outdoor space (later stage): A permanent planting site with full sun (6+ hours/day) and well-draining soil (pH 6.0–7.5).
- ● Local climate knowledge: Pecan trees thrive in USDA Zones 6–9—check if your area is suitable!
- ● Rooting hormone (speeds up germination for stubborn nuts).
- ● Soil moisture meter (prevents over/under-watering).
- ● Label markers (track different nuts if experimenting!).
- ● Mulch (protects young seedlings from temperature swings).
Step-by-step instructions for growing pecan trees from nuts
Here’s the foolproof method I’ve used to sprout pecans with near-guaranteed success—no fancy equipment needed.
🌱 Step 1: Select and Prepare the Pecans
Pick only fresh, plump pecans with intact shells and no cracks or mold. The fresher the nut, the higher your germination rate. I like to soak them in lukewarm water for 24 hours to soften the shell slightly—this helps the embryo break through later. Drain and let them dry overnight on a paper towel.
Real talk: Don’t use store-bought pecans from the grocery shelf. They’ve been processed to prevent sprouting. Only use pecans you’ve harvested yourself or sourced from a trusted grower. The shell should feel firm but not brittle when you tap it.
🌱 Step 2: Stratify for Cold Treatment
Pecans need a cold stratification period to mimic winter conditions, which breaks dormancy. Place the soaked pecans in a sealed plastic bag with a damp paper towel—just enough moisture to keep it slightly damp, not soggy. Store the bag in your refrigerator’s crisp drawer for 6-8 weeks.
Check them weekly. If the paper towel dries out, spritz it with water and reseal the bag. You’ll see tiny roots or a slight swelling at the base after about 4-6 weeks—that’s your signal the stratification is working. This step is non-negotiable; without it, germination rates plummet to near zero.
💧 Step 3: Plant in Moist Growing Medium
Fill a 6-inch deep container with a mix of 50% peat moss and 50% perlite—this ensures excellent drainage while retaining moisture. Pecan seeds need consistent dampness but will rot if waterlogged. Moisten the mix until it feels like a wrung-out sponge, then plant each pecan 1 inch deep, pointed end up.
Space them 2 inches apart if planting multiple nuts in one container. Gently press the soil around each nut to eliminate air pockets. Place the container in a warm, dark spot (like a closet or under the sink) and maintain 70-75°F soil temperature using a seedling heat mat if needed.
☀️ Step 4: Monitor for Sprouting and Light Exposure
Germination can take 4-12 weeks, depending on the pecan variety and stratification success. You’ll know it’s working when you see a tiny white root emerge first, followed by a sprout that pushes through the soil in 1-2 weeks after rooting. Once the sprout reaches 2 inches tall, move the container to bright, indirect light.
Here’s the thing—don’t rush to give direct sunlight yet. Young pecan seedlings are sensitive to intense light and can scorch. Gradually introduce them to morning sun only for the first week, then slowly increase exposure. You’ll see the leaves develop a deeper green color as they adjust.
⏰ Step 5: Transplant and Care for Young Seedlings
After 6-8 weeks of growth and when the seedlings have 3-4 sets of true leaves, it’s time to transplant them into individual 1-gallon pots filled with a mix of 60% potting soil, 20% compost, and 20% sand. Handle the seedlings carefully—they have delicate roots. Water thoroughly after transplanting to settle the soil.
Keep the pots in a shaded outdoor area for another 2 weeks to harden off the seedlings. Water when the top 1 inch of soil feels dry, and avoid letting the soil dry out completely. Pecan trees are drought-tolerant once established, but young seedlings need consistent moisture to thrive.
Tips & tricks for perfect pecan tree germination
These insider strategies will help you maximize your success rate when growing pecan trees from nuts.
Selection is Everything: The quality of your starting pecans makes all the difference. Look for nuts that are heavy for their size and have a firm, unbroken shell—these are your best candidates. I always test the freshness by gently tapping the shell; it should sound hollow but solid, not brittle. Store-bought pecans are often treated to prevent sprouting, so if you don't have fresh nuts, consider ordering from specialty nurseries that sell untreated seeds.
Stratification Success: During the 6-8 week cold treatment in Step 2, place your sealed bag on the refrigerator shelf closest to the back where temperatures are most consistent. I've found that checking weekly and maintaining that damp-but-not-soggy paper towel is crucial—the moment it dries out, your germination window narrows significantly. You'll know you're on track when you see the first signs of root growth around 4-6 weeks, though some varieties may take longer.
Temperature Control: Maintaining that 70-75°F soil temperature during Step 3 is easier than it sounds. I use a simple seedling heat mat under my growing container, but you can also place the container on top of your refrigerator (not inside) where it stays warm. The key is consistency—fluctuations can shock the developing embryo. If you notice condensation forming on the container's sides, that's a good sign you've got the moisture balance right.
Light Transition Strategy: When your seedlings reach 2 inches tall in Step 4, I recommend a gradual light introduction. Place them near an east-facing window where they'll get morning sun but not the intense afternoon rays. You can also use a sheer curtain to diffuse sunlight during the first week. Watch for leaves that develop a vibrant green color rather than yellowing or browning—this tells me they're adapting well to their new light conditions.
Pro Tips for Start A Pecan Tree From Nut
- These insider strategies will help you maximize your success rate when growing pecan trees from nuts.
- Selection is Everything: The quality of your starting pecans makes all the difference.
- Stratification Success: During the 6-8 week cold treatment in Step 2, place your sealed bag on the refrigerator shelf closest to the back where temperatures are most consistent.
Frequently asked questions
Got questions about growing pecan trees from nuts? You’re not alone! Here are answers to the most common queries—plus a few pro tips to keep your pecan project thriving.
How long does it take for a pecan nut to sprout?
A pecan nut typically takes 4–8 weeks to sprout after stratification (cold treatment). Warmth and moisture speed this up, but patience is key—some nuts may take up to 3 months if conditions aren’t ideal. Monitor soil moisture and keep temps between 70–85°F (21–29°C) for best results.
Do I need to refrigerate pecan nuts before planting?
Yes!
Pecans require stratification (cold treatment) to break dormancy. Place nuts in a moist medium (like peat moss) and refrigerate for 6–12 weeks at 34–40°F (1–4°C). This mimics winter and triggers germination. Skip this step, and your nuts may never sprout.
Can I grow a pecan tree from a store-bought pecan?
Store-bought pecans are often pasteurized or treated to prevent mold, which kills germination. For best results, use fresh, raw pecans from a tree (or a trusted organic source). Look for plump, uncracked nuts with no signs of pests or disease.
How do I tell if my pecan seedling is healthy?
A healthy pecan seedling has:
- Firm, green leaves (no yellowing or browning).
- A straight, sturdy stem (not leggy or weak).
- New growth after 2–3 months (signs of strong roots).
- No mold or pests on soil or leaves.
Can I grow a pecan tree in a pot before transplanting?
Absolutely!
Start seedlings in 5–7 gallon pots with well-draining soil. Use pots with drainage holes and keep them in full sun (6+ hours/day). Transplant outdoors after 1–2 years, when roots fill the pot. Choose a permanent spot with 6–8 hours of sun and acidic, well-draining soil (pH 5.5–6.5).
What if my pecan nut rots or mold grows?
Rotting or mold usually means too much moisture or poor airflow. If you see:
- Fuzzy white/green mold → Reduce watering and improve ventilation.
- Soft, mushy nuts → Drain excess water and replant in fresh, dry medium.
- Black spots → Fungal infection—treat with neem oil or copper fungicide.
Still stumped? Drop your question in the comments—we’re happy to help your pecan tree grow strong!
Wrapping up and next steps
Growing a pecan tree from a nut is a rewarding journey that combines patience, care, and a little science! 🌱 With the right techniques—like proper stratification, consistent moisture, and a warm, sunny spot—you can achieve a 90% success rate and nurture a thriving tree.
Whether you're dreaming of homegrown pecans or simply love the challenge of propagation, every small step brings you closer to success.
Now that you’re armed with the know-how, take the next step: gather your materials, pick a healthy nut, and start your pecan tree adventure today! Share your progress with fellow gardeners or even start a small orchard—your future tree (and tasty harvest!) will thank you. 🌳✨