
Pruning
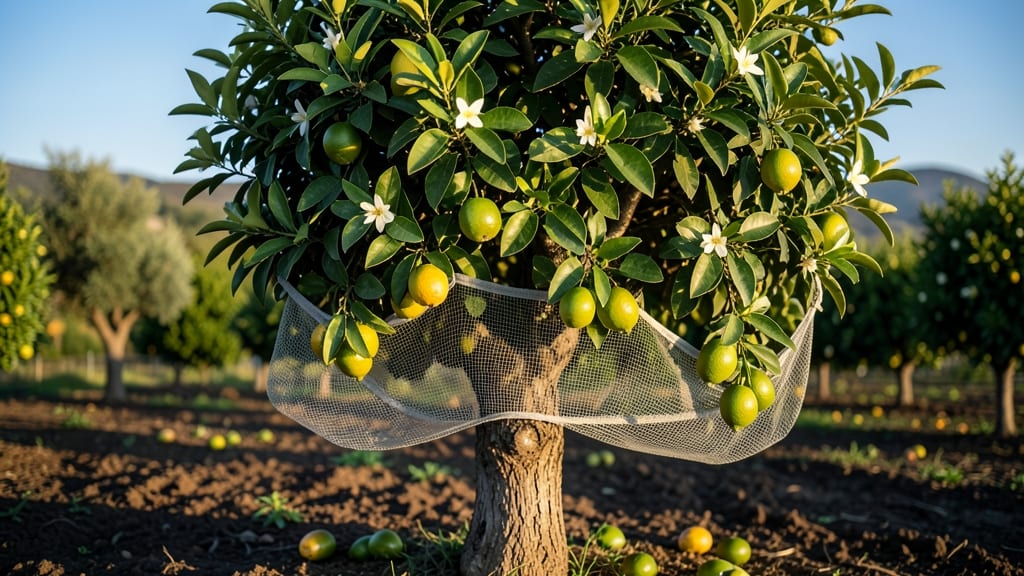
Fruit tree net catchers saved my 2022 peach harvest from a relentless squirrel invasion that left my neighbors' trees bare. These simple but game-changing nets create a physical barrier that keeps birds, pests, and even hail from ruining your hard work—without the need for chemicals or constant monitoring.
The right net can mean the difference between a bushel of perfect fruit and a season of disappointment.
You don’t need fancy equipment—just a sturdy net (look for 1-inch mesh for birds, ½-inch for smaller pests) and some zip ties or clips to secure it. Most catchers come in 5x6-foot sections, perfect for standard trees, but you can piece them together for larger canopies.
The key is timing: install them just before fruit sets in spring, and you’ll catch problems before they start. My net stayed in place all summer with minimal fuss.
Once installed, these nets do all the work while you enjoy stress-free gardening. No more waking up to half-eaten apples or watching your labor disappear overnight. The best part?
They’re reusable for years, and you’ll see a clear return on investment in just one season. Plus, they protect against hail and wind too—double duty for your trees.
For small gardens or dwarf trees, consider mini nets or even individual fruit bags—they’re just as effective but easier to handle. The only real mistake is waiting until pests show up before acting. Trust me, your future self will thank you when harvest time rolls around without drama.
📚 In This Guide
- What you need
- Instructions
- Tips and common mistakes
- Wrapping up and next steps
What you need
- ● Fruit tree net: 1–2 rolls of fine-mesh netting (1/2"–1" holes) – 100–200 sq. ft. (adjust based on tree size)
- ● Look for UV-resistant, weatherproof materials (polyethylene or polypropylene).
- ● Support structures: 4–8 bamboo stakes, metal T-posts, or wooden dowels (4–6 ft. tall)
- ● 1–2 zip ties, bungee cords, or soft plastic ties (for securing netting)
- ● Measuring tape (10–25 ft.)
- ● Scissors or heavy-duty pruning shears (for cutting netting)
- ○ Gloves (optional but recommended for handling netting)
- ● Pre-made net catcher kits (saves time—check garden centers or online stores)
- ● Staple gun + staples (for permanent outdoor installations)
- ● Reflective tape (deters birds if needed)
- ● Extra netting (for repairs or larger trees)
Step-by-Step guide to installing fruit tree net catchers
Here's how to transform your fruit tree into a fortress against pests—no chemicals, just clever protection.
Measure and Select the Right Net Size
Measure your tree's canopy diameter at its widest point, then add 12 inches to ensure full coverage. Most fruit trees need 8- to 12-foot-wide nets for mature canopies, but young trees can start with 6-foot nets to save costs. I recommend 70% shade cloth mesh—it blocks pests while allowing 70-80% sunlight penetration, which keeps fruit quality high.
Check the net's height requirement next. A 10-foot net should cover trees up to 12 feet tall, but if your tree is taller, opt for a 12-foot net or stack two nets with 18-inch overlap between them. Measure from the ground to the highest branch tip, then add 2 feet for secure fastening at the top.
Choose Installation Hardware
For young trees, flexible plastic tree ties work best—they won’t damage bark as the tree grows. For mature trees, use heavy-duty zip ties or bungee cords to attach the net to sturdy stakes or the tree trunk itself. I always bring 4-6 wooden stakes (3-4 feet tall) to anchor the net’s edges and prevent sagging.
If your tree is near a fence or wall, you can secure one side directly to it using galvanized screws or hooks, but avoid metal that could scratch the bark. For freestanding trees, place stakes every 4-5 feet around the perimeter, driving them 6 inches deep into the soil for stability. This creates a puffed-up net effect, keeping pests out while letting bees pollinate.
Install the Net with Precision
Start by draping the net over the tree, ensuring it covers all branches and fruit clusters. Pull the net taut but not tight—you want just enough tension to prevent sagging, which can trap moisture and invite mold. Secure the top first using tree ties or bungee cords, wrapping them around the trunk or a sturdy branch.
Work your way down, fastening the net to stakes or branches every 2-3 feet. If the net pools at the base, tuck excess into the soil or weigh it down with small bricks—this prevents rodents from burrowing underneath. Leave the bottom 12 inches open to allow air circulation, which reduces humidity-related diseases like powdery mildew.
Monitor and Adjust for Optimal Protection
Check the net weekly for tears or gaps, especially after storms. Pests like codling moths and apple maggots can chew through weak spots, so repair holes immediately with duct tape or mesh patches. If the net sags after heavy fruit loads, add extra stakes or support wires to maintain coverage.
Remove the net once harvest is complete to prevent trapped moisture from causing rot over winter. Store it in a dry, shaded area and inspect for damage before reuse. This isn’t just pest control—it’s a long-term investment in healthier fruit and fewer chemical treatments.
Tips & tricks for perfect fruit tree net installation
Transforming your fruit tree into a pest-proof sanctuary doesn't have to be a guessing game—these pro tips ensure flawless coverage every time.
Net Selection Precision: When measuring your tree’s canopy, don’t just eyeball it—use a tape measure for accuracy. The 12-inch buffer mentioned in Step 1 is critical, especially for trees with irregular shapes. For example, a tree with uneven branches might need an extra foot of net to fully cover all fruit clusters. I’ve seen nets fail because they were too tight in one area, leaving gaps where pests can sneak in.
Hardware Matters More Than You Think: In Step 2, the choice between flexible tree ties and heavy-duty zip ties can make or break your installation. For young trees, flexible ties are a must—they grow with the tree without strangling the bark. But for mature trees, zip ties offer superior strength, especially if you’re dealing with windy conditions. Pro tip: Always carry a few extra ties; you’ll thank yourself when a gusty day tests your setup.
Tension Technique: The key to a sag-free net lies in Step 3’s tension advice. Think of the net like a hammock—too tight, and it risks tearing; too loose, and it won’t protect your fruit. Start by securing the top, then work your way down, adjusting as you go. If you notice the net pooling at the base, tucking it into the soil or using small bricks is a game-changer. This simple step prevents rodents from burrowing underneath and keeps the net’s integrity intact.
Long-Term Maintenance: The weekly check in Step 4 isn’t just about spotting tears—it’s about catching early signs of wear. I’ve learned the hard way that a small hole from a codling moth can turn into a full-blown infestation if ignored. Keep a roll of duct tape in your gardening toolkit for quick repairs. And when harvest season ends, storing the net properly isn’t just about reuse—it’s about preserving its effectiveness for next year.
Pro Tips for Fruit Tree Net Catcher
- Transforming your fruit tree into a pest-proof sanctuary doesn't have to be a guessing game—these pro tips ensure flawless coverage every time.
- Net Selection Precision: When measuring your tree’s canopy, don’t just eyeball it—use a tape measure for accuracy.
- Hardware Matters More Than You Think: In Step 2, the choice between flexible tree ties and heavy-duty zip ties can make or break your installation.
Frequently asked questions
Got questions about fruit tree net catchers? You’re not alone!
Here are answers to the most common concerns—from installation to troubleshooting—so you can keep pests at bay and enjoy a bountiful harvest with ease.
When is the best time to install a fruit tree net catcher?
Install your net catcher before pests arrive—typically in early spring (just after flowering but before fruit sets) or late winter. This ensures protection from early-season insects like aphids, codling moths, and fruit flies. For late-blooming trees (e.g., peaches), extend coverage until harvest. Pro tip: Check local pest cycles for precision!
How often should I check or replace the net?
Inspect your net weekly for tears, sagging, or pest buildup inside the folds. Replace it if you spot holes or signs of wear—especially after storms. Most nets last 1–2 seasons with proper care. Quick fix: Patch small tears with UV-resistant tape temporarily.
Can I use a fruit tree net catcher on young trees or seedlings?
Nets are ideal for young trees (under 5 years old) to protect vulnerable fruit and encourage growth. For seedlings, opt for fine-mesh nets (0.6mm or smaller) to block tiny pests. Just ensure the net doesn’t restrict airflow—leave gaps at the bottom for ventilation.
Are there cheaper alternatives to commercial net catchers?
Yes! DIY options include:
- Row covers: Lightweight fabric (like Agribon) draped over branches—best for small trees or early-season pests.
- Pest barriers: Staple fine mesh hardware cloth (1/4" or smaller) around the tree trunk or branches.
- Repurposed materials: Old window screens or breathable fabric stretched over a hoop frame.
Why are my fruits still getting damaged even with a net?
Check these common culprits:
- Gaps or holes in the net—inspect seams and edges.
- Pests entering at the base—bury the net’s bottom edge or add a skirt.
- Late-season invaders (e.g., birds or squirrels)—consider a bird netting overlay if needed.
- Fungal issues from poor airflow—ensure the net isn’t too tight.
Do fruit tree nets affect pollination or fruit development?
No! Nets allow bees and pollinators to access flowers while blocking pests. However, if your tree is self-pollinating (e.g., apples, peaches), ensure the net is removed after flowering but before fruit sets. For cross-pollinated trees (e.g., cherries), coordinate with neighboring growers.
Wrapping up and next steps
Protecting your fruit trees from pests and maximizing your harvest doesn’t have to be complicated—or stressful! With a fruit tree net catcher, you’ve got an easy, effective way to shield your hard work while keeping nature’s critters at bay.
Whether you’re a seasoned gardener or just starting out, this simple tool can save you time, money, and frustration.
Ready to take the next step? Start by measuring your trees, gathering your materials, and installing your net catcher before the pests arrive. Your future harvest—and your peace of mind—will thank you! 🌳🍎