
Pruning
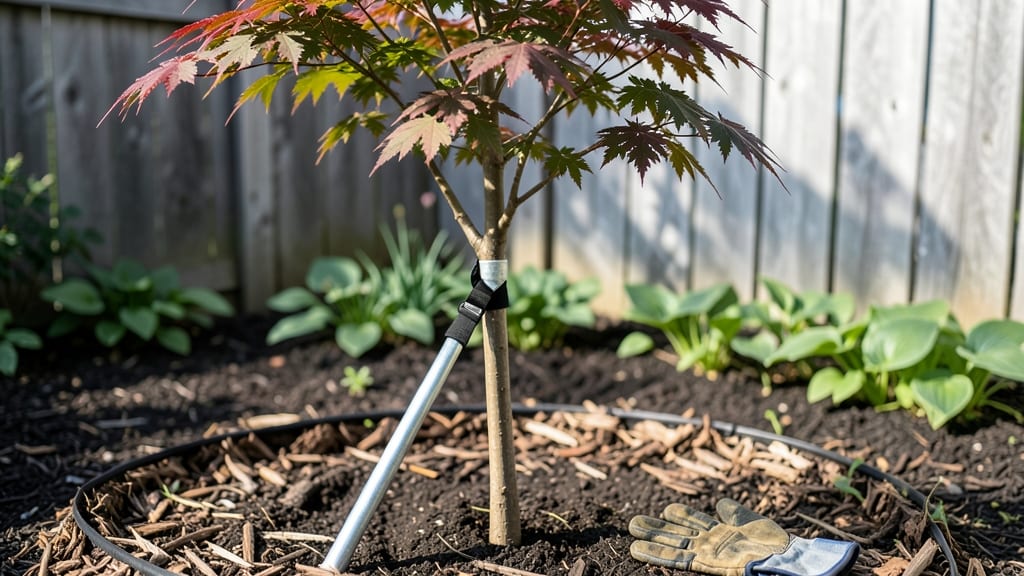
Young trees need tree brace support to survive their first few years—without it, they lean, split, or snap in the first strong wind. 🌳 I learned this the hard way when a 3-foot gust turned my sapling into a crooked stick.
The right brace isn’t just about looks; it’s about giving roots time to anchor while the trunk strengthens. You’ll need sturdy materials (plastic, metal, or wooden braces work best) and a few basic tools: a drill, screws, and maybe some landscape fabric to protect the bark.
The key is matching the brace to your tree’s size—too loose, and it won’t help; too tight, and you’ll strangle growth. Most braces last 2–3 years, but check them after storms. What you’ll get is a tree that stands tall, even in hurricane season.
No more leaning trunks or split bark—just steady, healthy growth. The best part? Once the tree’s trunk reaches 2–3 inches thick, you can remove the brace and watch it thrive on its own. Works for any young tree in windy areas, from backyard maples to newly planted shade trees.
Let’s get yours stabilized!
📚 In This Guide
- What you need
- Instructions
- Tips and common mistakes
- Wrapping up and next steps
What you need
- ● Tree brace support kit – Choose a metal or heavy-duty plastic brace designed for your tree’s size (check diameter compatibility).
- ● Stakes (3–4) – 1-inch diameter, 4–6 feet long, made of galvanized steel or fiberglass to prevent rust.
- ● Strap or tie-down system – Wide, adjustable nylon or polyester straps (3–4 inches wide) to secure the brace without damaging the trunk.
- ● Concrete or soil anchors – 2–3 bags of quick-setting concrete mix (if stakes need anchoring) or sturdy metal spikes for softer soil.
- ● Measuring tape – To ensure proper spacing (typically 12–18 inches from the trunk).
- ● Shovel or post-hole digger – For securing stakes in the ground.
- ● Drill or hammer – To pre-drill holes in stakes (if using metal) or drive spikes.
- ● Adjustable wrench – For tightening bolts on the brace.
- ● Safety gloves & eye protection – Always prioritize safety when working with hardware!
- ● Tree guard or wrap – Protects the trunk from strap friction over time.
- ● Extra straps – For trees with irregular shapes or multiple weak points.
- ● Waterproof sealant – If using wood stakes (though metal/fiberglass is preferred).
Step-by-step guide to installing tree brace supports
Here's how I stabilize young trees so they grow strong and straight—no guesswork, just proven techniques.
🪴 Step 1: Choose the Right Brace Type for Your Tree
For young trees under 6 feet tall, I recommend tree ties or spiral braces made from recycled plastic or metal. These flex with the tree’s movement instead of cutting into the bark. Avoid rigid metal braces—they can strangle the trunk as it grows. For heavier trees or high-wind areas, tree guards with adjustable straps distribute pressure more evenly.
Measure your tree’s trunk diameter at 12 inches above the ground—this determines the brace size. Most kits include sizing charts, but I always double-check with a tape measure. If the brace feels snug but not tight, it’s the right fit. Too loose, and it won’t stabilize; too tight, and you’ll restrict growth or damage the bark.
✂️ Step 2: Prepare the Tree and Brace Materials
Start by cleaning the trunk with a soft brush to remove sap, dirt, or debris where the brace will sit. This prevents moisture buildup, which can rot the bark over time. I like to mark the brace placement with a pencil—about 18 inches above the ground—to keep it out of the root flare area (that’s where the trunk widens at the base).
If using tree ties, cut them to length, leaving 2-3 inches of extra material on each end for adjustment. For spiral braces, unroll them partially so you can wrap around the trunk without stretching. Lay everything out nearby so you’re not scrambling mid-installation. Pro tip: Wear gloves—tree sap is sticky, and bark can be rough.
🌱 Step 3: Install the Brace Securely Without Damaging the Tree
Wrap the brace around the trunk at your marked height, overlapping the ends by 1-2 inches for tree ties. For spiral braces, start at the bottom and twist upward, ensuring the plastic or metal ribs align vertically. The brace should sit flat against the trunk—no gaps or tilting. If it feels uneven, adjust before tightening.
Secure the brace using the adjustable straps or clips included in your kit. Tighten just enough so the brace stays in place when you gently pull on it, but leave room for the trunk to slightly expand and contract with temperature changes. I test this by pressing my thumb against the brace—if it gives a little, it’s right. Too tight, and you’ll see dents or bark splitting within weeks.
☀️ Step 4: Position and Anchor for Wind Resistance
Angle the brace slightly upward (about 10-15 degrees) to guide the tree’s growth straight. This mimics natural wind pressure and prevents the tree from leaning into the brace over time. For extra stability, anchor the brace to a stake driven 6-12 inches into the ground on the leeward side (the side where wind hits first).
Use soft ties or elastic straps to connect the brace to the stake—never wire or rigid materials. The goal is to resist wind without restricting movement. After a storm, check the brace for loosening or shifting. If the tree sways more than 10 degrees in strong winds, it’s time to tighten or add another anchor point. Real talk: I’ve seen braces fail because they weren’t checked after the first big wind.
⏰ Step 5: Monitor and Adjust as the Tree Grows
Inspect the brace every 3-4 months and after major storms. Look for signs of rubbing (scuffed bark), loose straps, or roots pushing against the stake. If the brace feels too tight, loosen it immediately—you should be able to slide a business card between the brace and trunk. For spiral braces, rotate them 90 degrees annually to prevent uneven pressure.
Most braces last 3-5 years, but remove them once the tree’s trunk reaches 2 inches in diameter at the brace height. At that point, the tree’s own strength outweighs the need for support. I mark the removal date on a calendar reminder so I don’t forget—trust me, a forgotten brace can do more harm than good over time.
Tips & tricks for perfect tree brace support
Between us, installing tree braces isn't rocket science—but avoiding these common pitfalls will make all the difference in how your young trees grow.
Brace Selection: When choosing between tree ties and spiral braces, consider your tree's flexibility. Spiral braces work best for trees that sway naturally, while tree ties offer more adjustable support for stiffer trunks. I've found that plastic spiral braces are my go-to for most young trees because they flex with growth and won't cut into bark like metal options can. For trees in exposed areas, look for braces labeled "UV-resistant" to prevent cracking from sun exposure.
Placement Precision: That 18-inch mark from the ground is critical—it keeps the brace above the root flare where the trunk widens. I learned this the hard way after seeing a brace dig into a young oak's base, creating a perfect entry point for disease. Use a pencil to mark the spot clearly, and double-check with a tape measure before making any cuts. The brace should sit flat against the trunk without any gaps that could cause rubbing.
Wind Resistance Test: After installing, give your tree a gentle push to test stability. It should sway slightly but return to its upright position. If it leans significantly, you need to either tighten the brace or add another anchor stake. I've seen braces fail spectacularly in storms because they weren't properly secured—always check after major wind events. For extra peace of mind, consider adding a second anchor stake on the opposite side if your area gets particularly fierce winds.
Long-Term Maintenance: Set calendar reminders for those 3-4 month inspections—trust me, you'll forget if you don't. Pay special attention to spiral braces which can develop pressure points over time. The business card test is your best friend here: if you can't slide a card between the brace and trunk, it's too tight. For trees in urban areas, also check for power line clearance—some braces can actually cause trees to grow into power lines if not monitored.
Pro Tips for Tree Brace Support
- Between us, installing tree braces isn't rocket science—but avoiding these common pitfalls will make all the difference in how your young trees grow.
- Brace Selection: When choosing between tree ties and spiral braces, consider your tree's flexibility.
- Placement Precision: That 18-inch mark from the ground is critical—it keeps the brace above the root flare where the trunk widens.
Frequently asked questions
Got questions about tree brace support? You’re not alone—many gardeners and arborists wonder how to use these tools effectively. Below, we’ve answered the most common questions to help you stabilize your young trees with confidence!
When is the best time to install a tree brace support?
The ideal time is immediately after planting or when you first notice signs of instability (e.g., leaning, cracking soil, or excessive swaying). For newly planted trees, install braces within the first 6–12 months to prevent root establishment issues. Avoid installing during extreme weather—wait for calm, dry conditions to ensure proper fit and safety.
Can I use a tree brace on a mature tree?
While braces are designed for young, flexible trees, they can work for mature trees in specific cases—like storm-damaged or structurally weak specimens. However, mature trees often need cabling or staking instead. Always consult an arborist first, as improper bracing can cause girdling (damaging the trunk over time).
How tight should the brace straps be?
Too tight = stress or girdling; too loose = ineffective support. Aim for a snug but flexible fit—you should be able to slip one finger between the strap and the trunk. Check tension every 3–6 months and adjust as the tree grows. Never cinch straps until they’re painfully tight!
What’s the difference between a brace and a stake?
| Tree Brace Support | Tree Stakes |
|---|---|
| Wraps around the trunk and a fixed post, allowing natural movement while reducing stress. | Attaches to the trunk and ground, restricting movement—can cause root circling if overused. |
| Best for young, flexible trees (1–3" diameter). | Better for very young seedlings or trees in high-wind zones. |
| Encourages natural trunk strength. | Risk of trunk damage if left too long. |
What should I do if my tree brace is digging into the bark?
This is a red flag! Stop using the brace immediately and loosen or remove it to prevent girdling. Check for indentations or discoloration on the trunk. If damage is minor, switch to a wider, softer strap (like a tree tie with padding). For severe cases, consult an arborist to assess long-term stability.
Wrapping up and next steps
Investing in a tree brace support isn’t just about aesthetics—it’s a proactive way to safeguard your young trees from wind damage and ensure their long-term health. 🌳 With the right materials and installation techniques, you’ll give your trees the stability they need to thrive for years to come.
Ready to take action? Start by assessing your trees today—measure, gather supplies, and install your brace supports before the next storm rolls in. Your future canopy will thank you!