
Pruning
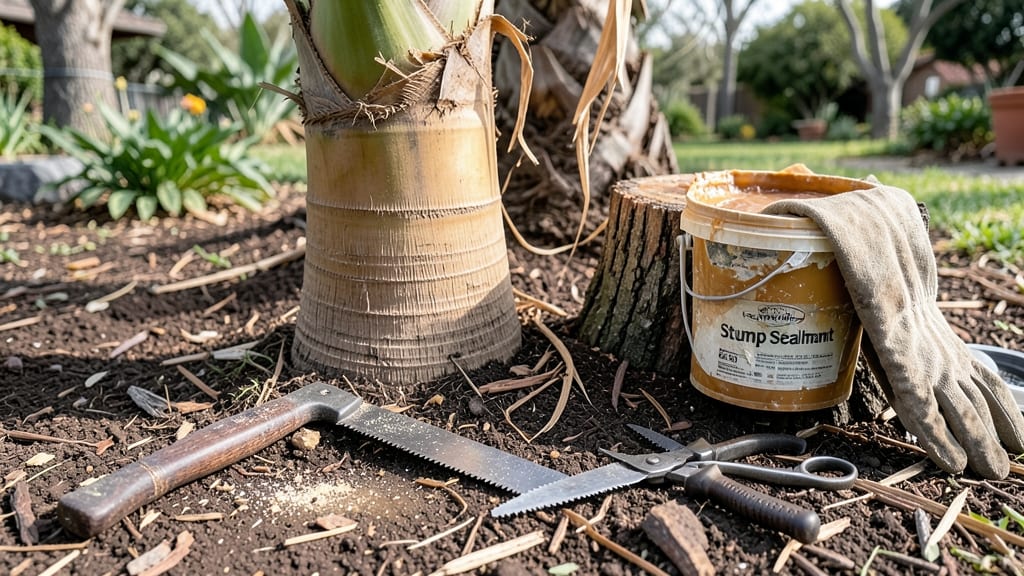
Cutting a palm tree trunk isn’t just about hacking away—it’s about precision that keeps your yard safe and your palm healthy. ✂️ I’ve seen too many messy cuts lead to rot, pests, or even fallen debris, so I’ve perfected a method that works for both small trunks and larger palms.
The key? Clean cuts, proper tools, and knowing exactly where to slice without damaging the roots or crown.
You’ll need a chainsaw (or handsaw for smaller trunks), safety gear, a pruning sealant, and a helper—palm trunks are heavy and unpredictable. Most people rush this step, but taking 10-15 minutes to prep saves hours of cleanup later.
The right cut angle prevents water pooling, which is critical for avoiding fungal infections that can kill the remaining stump.
What you’ll end up with is a stump that either regrows (if it’s a species like Majesty or Canary Island palm) or decays cleanly without leaving a hazard. For species that sprout from the base, you might get new fronds within 6-12 months, while others will need removal.
Either way, the yard stays safer and the palm’s future depends on how you make the cut.
This method works for both backyard palms and larger landscape specimens, though larger trunks may require professional help. The same principles apply whether you’re trimming for aesthetics, safety, or preparing the trunk for repurposing into furniture or mulch. Let’s get into the exact steps that make all the difference.
📚 In This Guide
- What you need
- Instructions
- Tips and common mistakes
- Wrapping up and next steps
What you need
- ● Safety gear: Heavy-duty work gloves (2 pairs) – cut-resistant and waterproof
- ● Safety goggles (1 pair) – ANSI-rated for debris protection
- ● Ear protection (1 pair) – for loud chainsaws or power tools
- ● Steel-toe or composite-toe boots (1 pair) – for foot protection
- ● Cutting tools: Chainsaw (1) – with a 16"–20" bar for medium-sized trunks
- ● OR Handsaw (1) – for smaller trunks (12"–16" blade)
- ● Pruning saw (1) – for precision cuts on branches or smaller sections
- ● Lopping shears (1 pair) – for trimming smaller fronds or debris
- ● Cleanup & prep: Rope or ratchet straps (2–4) – for securing the trunk if needed
- ● Heavy-duty trash bags (2–3) – for debris disposal
- ○ Pruning sealant (1 bottle) – optional, for sealing larger cuts
- ● Hose or bucket of water (1) – to clean tools and reduce dust
- ● Extension pole saw (1) – for high or hard-to-reach cuts
- ● Ladder or lift (1) – if the trunk is tall or unstable
- ● Marking spray paint (1 can) – to outline cut lines before trimming
- ● Respirator mask (1) – if cutting in dusty or polluted areas
- ● First-aid kit (1) – for minor cuts or scrapes
Instructions for cutting a palm tree trunk safely and effectively
Here's how to trim a palm trunk with precision—keeping your plant healthy and preventing disease.
✂️ Step 1: Gather the Right Tools and Safety Gear
You'll need a sharp pruning saw (for thick trunks) or hand pruners (for smaller stems), rubbing alcohol to sterilize tools, gloves (palm sap can irritate skin), and eye protection. I always wear long sleeves too—palm sap stains and can cause rashes. Clean your tools with rubbing alcohol before and after cutting to prevent spreading fungal infections between plants.
Check the weather first. Cutting on a dry, sunny day (not windy) ensures clean cuts and faster healing. Avoid trimming during rain or high humidity, which invites rot. If you're working with a tall palm, bring a sturdy ladder or hire a professional—working at heights with heavy tools is risky.
🌿 Step 2: Identify the Right Cutting Points for Healthy Regrowth
Palms grow from the top downward, so you'll want to cut just above a leaf node (the bump where a frond emerges). Look for healthy, green fronds—never cut into brown or dead areas, as this signals decay below. For a clean removal, make your cut 1-2 inches above the node to avoid damaging the emerging frond.
If you're removing a dead frond, cut it at the base where it meets the trunk. For live fronds, leave them unless they're yellowing or blocking sunlight to lower fronds. I like to mark the cutting line with a white pencil first—this helps visualize the cut before making it, especially on thick trunks.
🪴 Step 3: Make the Cut with Precision to Prevent Damage
Start with a small notch on the side of the trunk where you'll cut. Angle it slightly downward to create a guide for your saw. This prevents the blade from slipping and causing uneven tears. For trunks over 4 inches thick, use a pruning saw—hand pruners will struggle and crush the fibers.
Cut slowly and steadily, following the notch. Avoid sawing back and forth—this can splinter the trunk. If you hit a hard spot (like a buried leaf base), pause and adjust your angle. After cutting, the surface should be smooth, not jagged. Sand rough edges lightly with 120-grit sandpaper to encourage faster healing.
💧 Step 4: Treat the Cut to Promote Healing and Prevent Disease
Dip a clean cloth in rubbing alcohol and wipe the cut area to remove sap and potential bacteria. Then, apply a thin layer of palm wound sealant (like horticultural sealant) or pruning paint to protect the exposed area. This step is critical—open cuts are entry points for fungus and pests. I skip sealant only on very small cuts (under 1 inch wide).
Water the base of the palm deeply after trimming to help it recover. Avoid overwatering, though—palms hate soggy roots. Monitor the cut for discoloration or oozing sap in the weeks after trimming. If you see black or moldy spots, apply copper fungicide immediately to prevent spread.
⏰ Step 5: Monitor Regrowth and Adjust Future Trims
New fronds should emerge from the top in 3-6 months, depending on the palm species and season. If growth stalls or fronds turn yellow, your palm may be stressed from the cut or lacking nutrients. Feed it with a balanced palm fertilizer (like 8-8-8) in spring and fall to support recovery.
For future trims, I recommend light maintenance only—never remove more than 10% of the fronds at once. Over-trimming weakens the palm and can kill it. If you're unsure about a cut, take a photo first and compare it to healthy palm trunks online. Patience is key—palms grow slowly, and rushing trims leads to big mistakes.
Tips & tricks for precision palm trimming
These little details make all the difference between a healthy palm and one that struggles to recover.
Safety First: I can't stress this enough—palm sap is more than just sticky. It contains urushiol, the same irritant found in poison ivy, which can cause rashes or even blisters. Beyond wearing gloves, I always wear long sleeves and eye protection. If you're working with a tall palm, consider hiring a professional arborist. I've seen too many DIY attempts go wrong when someone tries to balance on a wobbly ladder with a saw.
Marking Your Cut: Before you make that first notch, grab a white pencil and mark your cutting line. This simple step prevents guessing and ensures you cut exactly 1-2 inches above the leaf node. I've ruined perfectly good cuts by eyeballing it—trust me, the pencil saves you from second-guessing. For thick trunks, use a carpenter's pencil or even a piece of masking tape to make the mark stand out against the trunk's texture.
Tool Selection Matters: Hand pruners will work for thin stems, but anything over 4 inches thick needs a pruning saw. I've tried using hand pruners on larger trunks, and it always ends up crushing the fibers instead of making a clean cut. For trunks between 2-4 inches, a bypass pruner works better than anvil pruners—they leave cleaner cuts that heal faster. Always check your blade sharpness beforehand; a dull blade will tear the trunk rather than cut it smoothly.
Healing Accelerator: After treating the cut with sealant, I've found that wrapping the area with a breathable landscape fabric (like a burlap strip) provides extra protection while still allowing airflow. Secure it loosely with twine—too tight and you'll restrict growth. This extra step is especially helpful in humid climates where disease risk is higher. Remove the fabric after 2-3 weeks once the cut has started to callous over.
Pro Tips for Cut Palm Tree Trunk
- These little details make all the difference between a healthy palm and one that struggles to recover.
- Safety First: I can't stress this enough—palm sap is more than just sticky.
- Marking Your Cut: Before you make that first notch, grab a white pencil and mark your cutting line.
Frequently asked questions
Got questions about cutting a palm tree trunk? You’re not alone—this task can feel tricky! Below, we’ve rounded up the most common concerns and broken them down into simple, actionable answers to help you trim with confidence.
When is the best time to cut a palm tree trunk?
The ideal time to trim a palm tree trunk is late winter or early spring when the tree is dormant but before new growth begins. Avoid pruning during extreme heat or cold, as this can stress the tree. For tropical palms, timing is less critical, but still prioritize dry, mild weather to reduce disease risk.
What should I do if the cut starts bleeding or oozing?
If your palm trunk "bleeds" sap after cutting, don’t panic—it’s normal! This is the tree’s way of sealing the wound. Let the sap dry naturally for a few days, then apply a pruning sealant (like horticultural wax) to speed up healing. Avoid watering the area immediately to prevent rot.
Can I cut a palm tree trunk without professional tools?
While it’s possible to use a handsaw or chainsaw for small palm trunks, precision tools like a pruning saw or pole saw are far safer and cleaner. For larger trunks, renting a stump grinder or hiring a pro is wise—palm wood is dense, and improper cuts can damage the tree’s vascular system.
Will cutting the trunk kill my palm tree?
No—if done correctly, cutting a palm tree trunk won’t kill it. The key is to avoid cutting into the crown shaft (the heart of the palm) or removing too much trunk at once. Focus on removing dead fronds or hazardous growth while preserving the meristem (growth center) at the top.
How can I prevent regrowth from becoming unmanageable?
To keep regrowth in check, trim suckers (sprouts) at the base as soon as they appear. For larger palms, consider thinning out fronds to improve airflow and sunlight penetration. Regular maintenance (every 1–2 years) prevents overgrowth and keeps your palm healthy and structurally sound.
What do I do if the cut looks jagged or uneven?
Jagged cuts can trap moisture and invite pests or disease. Smooth the edges with a pruning knife or file, then seal the wound. If the cut is deep, consider applying a fungicide to prevent rot. Always cut at a 45-degree angle for better drainage.
Wrapping up and next steps
Mastering the art of cutting a palm tree trunk isn’t just about precision—it’s about revitalizing your tree while ensuring safety and regrowth.
Whether you’re removing dead fronds, shaping your palm, or preparing for transplanting, the right tools, techniques, and timing make all the difference. 🌿 With patience and care, you’ll help your palm thrive for years to come!
Ready to take action? Mark your calendar for the next dry season, gather your tools, and start planning your palm’s fresh new look. Your tree—and your landscape—will thank you!