
Landscaping
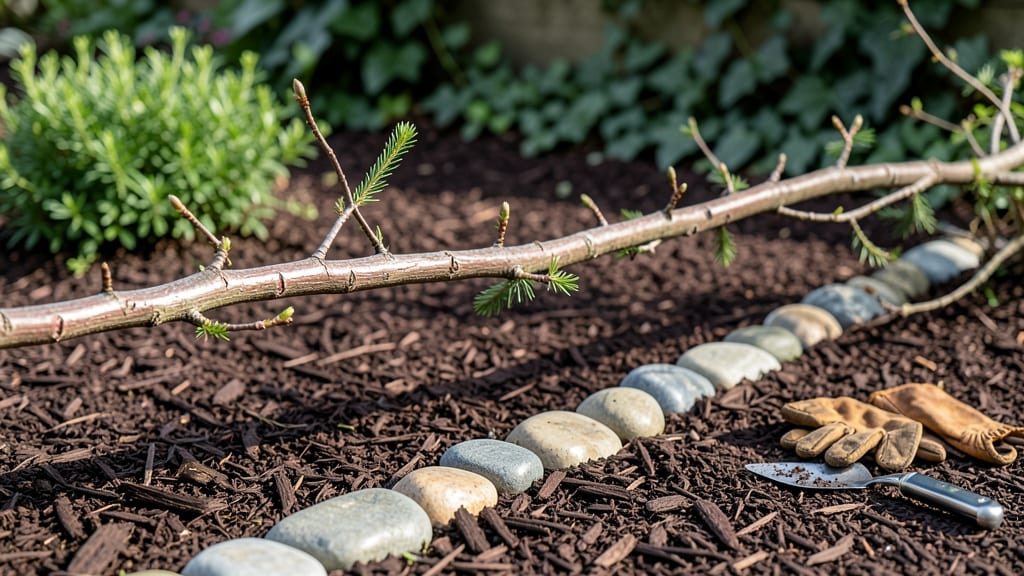
Tree branch garden edging transforms your yard into a woodland retreat without breaking the bank. 🌿 I stumbled upon this technique after clearing dead branches from my property—now they frame my flower beds with organic charm that no plastic edging could match.
The best part? It’s free, sustainable, and blends seamlessly with nature’s textures. You’ll need branches 4–6 feet long, a sturdy mallet or hammer, and a few hours on a dry day. Freshly cut branches work best—they’re flexible enough to weave or stack neatly.
For extra durability, soak them in water for 24 hours before arranging to prevent cracking. Paint or stain them if you want a pop of color, but I love the natural, weathered look over time. The results are stunning: defined borders that feel intentional, not forced.
Woven designs soften the look, while stacked branches create bold, textured lines. Pair them with wildflowers or hostas for a cottage-garden vibe, or keep it minimalist with gravel or mulch. This project works for any yard size, from small urban plots to sprawling countryside gardens.
Once installed, maintenance is minimal—just replace branches every 1–2 years as they weather. It’s the kind of edging that gets compliments and makes your garden feel like a true extension of the landscape.
📚 In This Guide
- What you need
- Instructions
- Tips and common mistakes
- Wrapping up and next steps
What you need
- ● Tree branches: 10–20 medium-sized branches (3–6 feet long, 1–3 inches in diameter). Opt for dried, flexible branches like willow, dogwood, or grapevine for durability.
- ● Garden stakes or rebar: 6–10 stakes (18–24 inches long) to secure the branches in place.
- ● Heavy-duty landscape fabric: 1 roll (to prevent weeds and stabilize the base).
- ● Twine or zip ties: 1–2 spools (for binding branches together).
- ● Post-hole digger or shovel: 1 (for securing stakes).
- ● Hammer or mallet: 1 (to drive stakes into the ground).
- ● Pruning shears: 1 pair (to trim branches to uniform lengths).
- ● Measuring tape: 1 (for precise spacing).
- ● Natural twine or jute: For a rustic, woven look between branches.
- ● Wood stain or sealant: To preserve branches and enhance color.
- ● Solar-powered landscape lights: To highlight your edging at night.
- ● Decorative stones or mulch: For added texture around the base.
Instructions for creating natural tree branch garden edging
Here's how to transform fallen branches into a charming, organic border that blends seamlessly with your garden.
🪴 Step 1: Gather and Prepare Your Materials
Collect straight, sturdy branches that are at least 1-2 inches in diameter and 2-3 feet long. Look for clean breaks with no rot or insect damage. I prefer branches with natural curves—they create more visual interest. Cut any side branches or leaves with pruning shears for a clean finish.
For a 4-foot border, gather about 8-10 branches. If you're using branches with bark still attached, give them a quick scrub to remove dirt and debris. This ensures they'll last longer and look more polished. Store them in a dry place until you're ready to use them.
☀️ Step 2: Plan and Mark Your Garden Border
Sketch a rough outline of your desired border on paper first. This helps you visualize the final look and ensures you have enough branches. For a curved border, use a garden hose or spray paint to mark the path on the ground. This makes it easier to follow while you're working.
Step along your marked path, placing branches end-to-end to check the spacing. You want them to sit snugly but not overlap too much. For a rustic look, leave small gaps between branches—about 1-2 inches. If you notice any branches that don't fit well, trim them slightly with your pruning shears to adjust.
✂️ Step 3: Install the Branches for a Sturdy Border
Start at one end of your marked path and begin placing the branches into the ground at a slight angle, about 45 degrees. Push them down until roughly 6-8 inches are buried. This ensures they stay upright and won't topple over. Tap the soil firmly around the base to secure them in place.
As you work, check that the branches are level with each other. If one dips or rises too much, adjust the angle or add a bit more soil beneath it. For extra stability, especially in windy areas, you can tie branches together with twine or wire at the top. This creates a cohesive look while preventing them from shifting over time.
💧 Step 4: Secure and Finish the Edging
Once all branches are in place, fill any gaps between them and the ground with soil. Pack it down gently to eliminate spaces where weeds might grow. If you're concerned about the branches shifting over time, you can also drive small stakes into the ground near the base of each branch for added support.
For a polished finish, consider adding a light coat of outdoor sealant to protect the wood from moisture and pests. This step is optional but can extend the life of your edging by several years. Step back and admire your work—your garden now has a natural, rustic border that complements the landscape beautifully.
🌿 Step 5: Maintain Your Branch Edging
Check your edging every 6-12 months to ensure branches are still standing upright. If you notice any leaning or shifting, gently push them back into place and add more soil if needed. Over time, the wood may weather and fade, but this only adds to the natural charm of your border.
If branches begin to rot or show signs of insect damage, replace them with fresh ones. This keeps your edging looking its best and prevents it from becoming an eyesore. With minimal upkeep, your tree branch garden edging will remain a stunning feature for years to come.
Tips & tricks for perfect tree branch garden edging
Between us, the details in Step 3 are where most people trip up—so here's how to nail that sturdy, natural look without the frustration.
Branch Selection Matters: While the instructions call for branches 1-2 inches in diameter, I've found that slightly thicker branches (up to 2.5 inches) create a more substantial border that lasts longer in windy conditions. Just be prepared to use a bit more effort to bury them securely. For extra durability, look for branches with dense, compact wood—these resist splitting better over time.
The 45-Degree Angle Secret: That 45-degree angle in Step 3 isn't just for looks—it's what keeps your branches standing tall. Use a level or even a smartphone app to check your angle as you work. If you're struggling to eyeball it, try this trick: place a small piece of cardboard at a 45-degree angle against the branch before burying it. This visual guide makes all the difference in creating that clean, professional look.
Optional Stability Upgrade: While the instructions mention tying branches with twine or wire, I've found that adding a small U-shaped stake near each branch's base—driven into the ground at a 30-degree angle—provides even better support without being visible. This is especially helpful for longer borders where wind might catch the top. Just bury the stake about 4 inches deep and tuck the branch between it and the ground for maximum stability.
Seasonal Timing Tip: If you're installing this in late summer or fall, consider waiting until early spring to plant your branches. The ground is softer then, making it easier to bury them to the recommended 6-8 inches. Plus, spring planting gives the soil time to settle around the branches before summer storms hit. For winter installations, choose branches that have been stored indoors to prevent them from freezing in the ground.
Pro Tips for Tree Branch Garden Edging
- Between us, the details in Step 3 are where most people trip up—so here's how to nail that sturdy, natural look witho...
- Branch Selection Matters: While the instructions call for branches 1-2 inches in diameter, I've found that slightly t...
- The 45-Degree Angle Secret: That 45-degree angle in Step 3 isn't just for looks—it's what keeps your branches standin...
Frequently asked questions
Got questions about using tree branches for garden edging? You’re not alone! Here are some common concerns and straightforward answers to help you get started with confidence.
Can I use any tree branches for edging, or are there specific types that work best?
While most fallen branches work, opt for dry, straight, and sturdy ones like oak, maple, or pine for durability. Avoid rotten, splintery, or overly thick branches—they’re harder to work with and may not last. Thin branches (1–3 inches in diameter) are ideal for lightweight, rustic looks.
When is the best time of year to install tree branch edging?
The best time is late fall or early spring when the ground is workable but not frozen. This gives branches time to dry fully (if fresh-cut) and reduces pest activity. Avoid installing during wet seasons—moisture can cause rot or fungal growth over time.
What are some alternatives if I don’t have access to tree branches?
No branches? No problem! Try these natural or low-cost alternatives:
- Pebbles or stones: Create a polished, timeless look with river rocks or flagstone.
- Recycled wood: Pallet slats or untreated lumber offer a similar rustic vibe.
- Bamboo stakes: Lightweight and flexible for curved borders.
- Bricks or cinder blocks: Sturdy and reusable for a structured edge.
How do I prevent pests or rot in my branch edging over time?
To keep branches pest-free and long-lasting:
- Apply a natural wood preservative (like linseed oil) to seal and repel insects.
- Elevate branches slightly with gravel or pavers to improve airflow.
- Replace any branches showing signs of mold, cracks, or insect damage promptly.
- Avoid burying branches directly in soil—this speeds up decay.
Can I paint or stain tree branches for a different aesthetic?
Lightly sand branches first, then use outdoor-safe, non-toxic stains or paints (like milk paint or acrylic). For a natural look, opt for muted tones (e.g., sage green or warm gray). Avoid dark colors—they can make branches look heavier and attract more heat.
Wrapping up and next steps
Transforming your garden with tree branch garden edging isn’t just about aesthetics—it’s a natural, budget-friendly way to elevate your outdoor space while embracing sustainability. Whether you’re drawn to the rustic charm of raw branches or the polished look of stained wood, these borders effortlessly blend function and beauty. 🌿
Ready to take the next step? Start small—try a single border along a path or flower bed, then expand as inspiration strikes. Grab your tools, gather branches, and let your creativity grow! Your garden’s new natural edge awaits.