
Landscaping
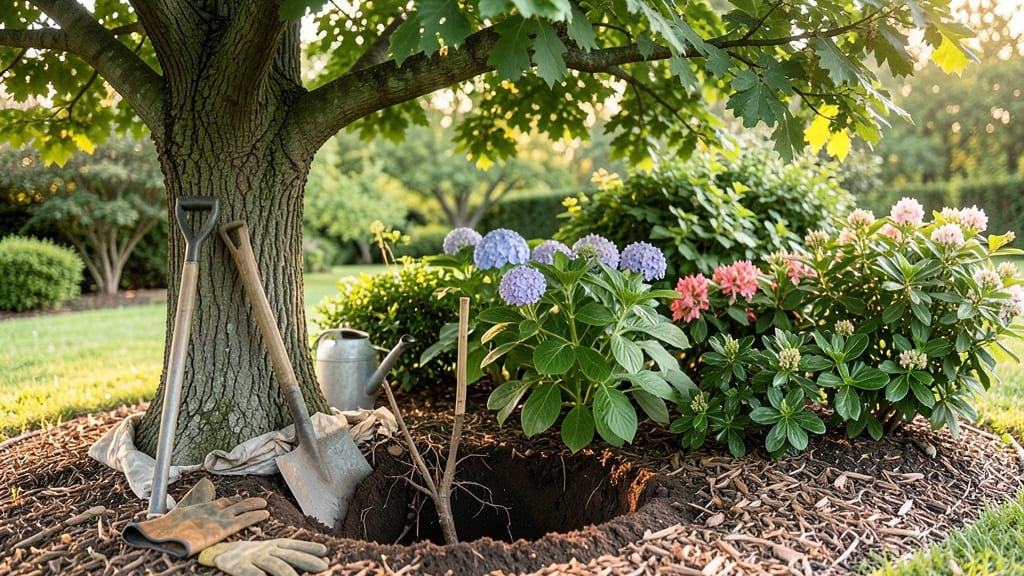
Landscape tree and shrub planting transforms your yard from ordinary to extraordinary. 🌳 The secret lies in matching plants to their perfect spots—where their colors, textures, and growth habits create a living tapestry that thrives year-round. I’ve learned that the best designs aren’t just about what you plant, but where you place it, and how it interacts with sunlight, wind, and existing structures.
Start by assessing your space: note sunlight patterns, soil conditions, and mature plant sizes. A 10-foot-tall oak planted too close to a patio will eventually cast deep shade, while a delicate 3-foot shrub needs room to breathe.
Sketch a rough layout first—this prevents costly mistakes like overcrowding or blocking views. My first attempt at this nearly buried a favorite garden bench under a fast-growing arborvitae!
With the right placement, you’ll create layers that work in every season: evergreens for winter structure, spring-blooming shrubs for color, and summer shade from mature trees. The payoff?
A landscape that feels intentional, not random—where every plant has a purpose and every corner feels inviting. Think of it as painting with foliage instead of brushstrokes.
Pro tip: Group plants with similar water needs together and avoid planting near downspouts or low spots where water pools. A little planning now means fewer headaches (and fewer shovels) later. Ready to turn your yard into a showstopper? Let’s get started with the essentials.
📚 In This Guide
- What you need
- Instructions
- Tips and common mistakes
- Wrapping up and next steps
What you need
- ● Trees & Shrubs: Deciduous trees (e.g., Oak, Maple) – 1-3 per design plan
- ● Evergreen trees (e.g., Pine, Spruce) – 2-4 for year-round structure
- ● Shrubs (e.g., Boxwood, Hydrangea, Azalea) – 5-10+ for texture and color
- ● Soil Amendments: Compost (5-10 bags, 40 lb each) for nutrient-rich soil
- ● Organic mulch (6-12 bags, 2-3 cu. ft. each) for moisture retention
- ● Slow-release fertilizer (e.g., 10-10-10 or organic options) – 1 bag per 5 plants
- ● Tools: Shovel (heavy-duty, 18-24") – 1
- ● Hoe or transplant spade – 1
- ● Pruning shears (bypass or anvil) – 1 pair
- ● Wheelbarrow (2-3 cu. ft.) – 1 for hauling materials
- ○ Garden hose with nozzle (optional but helpful) – 1
- ● Measuring tape (25 ft) – 1 for spacing
- ● Gloves (heavy-duty) – 1 pair
- ● Required: Site analysis report (sunlight, soil type, drainage)
- ● Local plant hardiness zone confirmation (USDA Zone Map)
- ● Permits (check local regulations for large trees/shrubs)
- ○ Optional (But Helpful!): Soil test kit ($10-$20) to check pH/nutrients
- ● Tree stakes (10-20, 4-6 ft tall) for support
- ● Drip irrigation system ($50-$200) for watering efficiency
- ● Erosion control fabric (for sloped areas)
- ● Plant markers (biodegradable or metal) – 10-30
Instructions for strategic tree and shrub placement
Here's how to map out your planting design for maximum seasonal interest and long-term success.
🌱 Step 1: Assess Your Site's Natural Conditions
Start by walking your property at different times of day to observe sunlight patterns and microclimates. Note where sunlight hits for 4+ hours daily—these spots are ideal for sun-loving shrubs like hydrangeas or butterfly bush. Shadier areas under existing trees work well for ferns, hostas, or rhododendrons. I always sketch a rough layout showing sun exposure, soil types, and drainage issues.
Check soil pH using a test kit—most shrubs prefer 6.0-7.0, while azaleas and blueberries need 4.5-5.5. Amend heavy clay soil with 2-3 inches of compost mixed into the top 12 inches of planting hole. This prevents root suffocation and improves water infiltration. I dig test holes every 10 feet to check drainage—if water pools after 30 minutes, you'll need raised beds or better soil amendments.
☀️ Step 2: Plan for Year-Round Interest Layers
Design your planting in three layers: tall trees, mid-height shrubs, and low ground covers. Place evergreens like arborvitae or boxwoods as structural backdrops—they provide winter interest while framing other plants. Underplant them with spring bloomers like daffodils or early-flowering shrubs to ensure visual appeal from March through December.
I like to stagger bloom times so something is always in flower. For example, pair early spring bloomers like forsythia with mid-season hydrangeas and late-season asters. Add textural contrast with shrubs like Russian olive (silver foliage) or purple smoke bush (velvety leaves). This creates visual depth and extends your garden's active season.
🪴 Step 3: Dig Properly Sized Planting Holes
Dig holes twice as wide as the root ball but no deeper—this encourages roots to spread horizontally rather than circling. For trees, the hole should be 3 times the diameter of the container. I use a shovel to loosen the sides of the hole to prevent soil compaction around new roots. Remove any rocks or debris from the planting area.
Create a 12-inch mound of native soil in the center of the hole. This prevents root settling and potential flooding. For container-grown plants, gently loosen the root ball before placing it in the hole. Backfill with the native soil you removed, tamping lightly every 6 inches to eliminate air pockets. Never use amended soil for backfilling—it disrupts the natural root-soil interface.
💧 Step 4: Water and Mulch for Establishment
Water deeply immediately after planting to settle the soil and eliminate air pockets. Give trees 10 gallons of water and shrubs 5 gallons—this ensures roots make contact with moist soil. I use a soaker hose to deliver water slowly at the base, avoiding leafy foliage. Water again in 3-5 days and then weekly for the first 6-8 weeks.
Apply 2-3 inches of mulch over the root zone, keeping it 6 inches away from the trunk to prevent rot. Use organic mulch like wood chips or shredded bark, which improves soil structure as it breaks down. This mulch layer helps retain moisture, regulate soil temperature, and suppress weeds. Replenish mulch annually to maintain the 2-inch depth—this protects young plants during hot summers and cold winters.
✂️ Step 5: Prune for Structure and Health
Prune at planting to remove any broken branches or crossing limbs that could rub together. For shrubs, cut back overgrown stems by one-third to encourage bushier growth. I always prune just above a outward-facing bud to maintain an open, airy structure. Avoid heavy pruning—you want to preserve the plant's natural form while encouraging new growth.
For newly planted trees, remove any lower branches that compete with the main trunk. This creates a strong, stable structure. Apply a 1-inch thick layer of arborist wood chips around the base, extending to the drip line. This protects the trunk from lawn equipment damage and helps retain soil moisture. Water the mulched area thoroughly to help it settle and make contact with the soil.
Tips & tricks for perfect landscape tree and shrub placement
These pro strategies will transform your yard from ordinary to extraordinary with minimal effort.
Sunlight Mapping: I can't stress enough how critical this step is—use a simple app or even a notebook to track sunlight patterns over a week. Mark areas that receive 4+ hours of direct sun with a bright marker; these are prime spots for sun-loving shrubs like hydrangeas or butterfly bush. For shade lovers, observe where dappled light filters through—this is perfect for ferns or hostas. I've learned the hard way that moving a plant after it's established can shock the roots, so get this right the first time.
Soil Test Precision: Don't guess about soil pH—test it! Most garden centers sell affordable test kits. Remember, azaleas and blueberries need that 4.5-5.5 pH range, while most other shrubs thrive at 6.0-7.0. I've seen beautiful plants fail because they were planted in soil that didn't match their needs. For clay-heavy soils, mix 2-3 inches of compost into the top 12 inches of your planting hole—this improves drainage and prevents root suffocation. The key is blending the compost with native soil, not just adding it as a top layer.
Planting Hole Engineering: The secret to successful planting lies in how you dig. Create that 12-inch mound of native soil in the center of the hole—this prevents root settling and potential flooding. For container-grown plants, gently loosen the root ball before placing it in the hole. I use a garden fork to tease out any circling roots that might have formed in the container. When backfilling, tamp lightly every 6 inches to eliminate air pockets. This might seem tedious, but it's what separates thriving plants from struggling ones.
Mulch Mastery: Apply 2-3 inches of organic mulch over the root zone, but keep it 6 inches away from the trunk to prevent rot. I've found that wood chips or shredded bark work best—they improve soil structure as they break down. The mulch layer acts like a blanket, helping retain moisture and regulate soil temperature. Replenish it annually to maintain that 2-inch depth**—this protects your plants during extreme weather and keeps weeds at bay.
Pro Tips for Landscape Tree And Shrub Planting
- These pro strategies will transform your yard from ordinary to extraordinary with minimal effort.
- Sunlight Mapping: I can't stress enough how critical this step is—use a simple app or even a notebook to track sunlig...
- Soil Test Precision: Don't guess about soil pH—test it! Most garden centers sell affordable test kits. Remember, azal...
Frequently asked questions
Got questions about planting trees and shrubs for a stunning landscape? We’ve got answers! Here are some of the most common queries from homeowners and landscapers alike.
What’s the best time of year to plant trees and shrubs for long-term success?
The ideal window is early spring or fall—when temperatures are mild, and soil is workable but not frozen. Spring planting (before leaves emerge) gives roots time to establish before summer heat, while fall (6-8 weeks before frost) lets plants settle in before winter dormancy. Avoid extreme heat or cold to reduce transplant shock!
How far apart should I space trees and shrubs for healthy growth?
Spacing depends on the mature size of the plant. For small shrubs (3–6 ft tall), aim for 2–4 ft apart. Medium shrubs (6–10 ft) need 5–8 ft, while large trees (30+ ft) require 25–40 ft between trunks. Check the plant tag for guidance—crowding leads to competition for water and nutrients, stunting growth.
How often should I water newly planted trees and shrubs?
For the first 2–3 weeks, water daily (deeply, 1–2 inches per week) to encourage root establishment. After that, taper to 2–3 times per week for the first year, focusing on the root zone. Mulch (2–4 inches deep) retains moisture and reduces evaporation. Pro tip: Use a soaker hose for slow, deep watering!
Can I plant trees and shrubs in winter? What are the risks?
While bare-root plants (dormant) can be planted in winter, active growth is risky. Frost-heaving (soil expanding/contracting) can uproot shallow roots, and frozen ground makes digging difficult. If you must plant, choose hardy, cold-resistant species and protect roots with mulch. Spring or fall are still the gold standards!
What should I do if my newly planted shrub turns yellow or wilts?
Yellowing leaves often signal overwatering, poor drainage, or nutrient deficiency. Check soil moisture—soggy roots suffocate plants! Wilting could mean underwatering or transplant shock. Trim damaged foliage, ensure proper drainage, and fertilize lightly (if needed) with a balanced, slow-release formula. Monitor for pests like spider mites too!
Are there low-maintenance alternatives to high-growth trees?
Opt for slow-growing, drought-tolerant species like Japanese maples, boxwoods, or dwarf conifers. Native plants (e.g., serviceberry or oakleaf hydrangea) thrive with minimal care and support local ecosystems. Avoid fast growers like willows—they demand constant pruning and can outgrow their space quickly!
Wrapping up and next steps
Transforming your outdoor space with landscape tree and shrub planting isn’t just about aesthetics—it’s about creating a thriving, year-round haven that reflects your style and enhances your property’s value. 🌿 By thoughtfully selecting plants, planning strategic placement, and maintaining them with care, you’ll enjoy seasonal beauty, privacy, and even wildlife support.
Ready to turn your vision into reality?
Your next step? Sketch a simple layout or consult a local nursery expert to refine your design. Whether you’re a beginner or a seasoned gardener, every well-placed plant brings you closer to a landscape that feels like home!