
Pruning
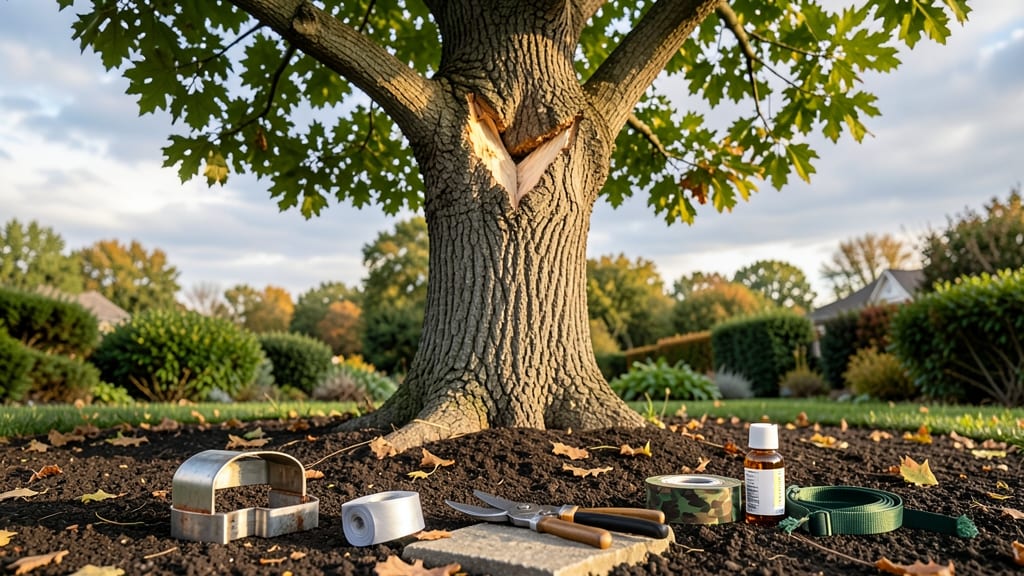
That split in your tree branch isn’t just an eyesore—it’s a safety hazard waiting to happen. 🌳 I’ve seen too many branches snap under snow or wind because the split wasn’t fixed properly, so I’m sharing the 3-step repair method that’s saved my oak, maple, and even my stubborn Bradford pear from becoming liability risks.
The key is acting fast before the split widens or rots set in. You’ll need basic tools—a handsaw, pruning shears, tree repair clips (or sturdy wire), and a little elbow grease. The process takes 20-30 minutes, and the right technique keeps the tree stable for years.
I’ve even used this on branches too high to reach by tying a rope to the clip and pulling it up with a pole.
After repair, your tree will look better and grow stronger—no more gaping wounds or weak forks. The clips I use stay hidden under bark as the tree heals, and proper pruning afterward encourages new growth where you want it.
The worst that’ll happen is a few scars, not a fallen limb in your yard.
For splits wider than your thumb or on valuable trees, call an arborist—some splits need structural support beyond DIY fixes. But for 90% of homeowners? This method works like a charm. Let’s get that branch back in fighting shape before winter hits.
📚 In This Guide
- What you need
- Instructions
- Tips and common mistakes
- Wrapping up and next steps
What you need
- ● Safety gear: Work gloves (heavy-duty, cut-resistant) – 1 pair
- ● Safety goggles – 1 pair
- ● Ear protection (if using power tools) – 1 pair
- ● Repair supplies: Tree repair epoxy or clamp kit (e.g., Tanglefoot Tree Wound Dressing or Fiskars Tree Repair Clamp) – 1-2 units
- ● Wood filler (for small cracks) – 1 small tub
- ● Sandpaper (medium-grit, 80-120) – 1 sheet
- ● Cutting & shaping tools: Hand pruners (bypass, sharp) – 1 pair
- ● Loppers (for thicker branches) – 1 pair
- ● Handsaw or chainsaw (for large branches) – 1 unit
- ● Cleanup supplies: Rags or paper towels – 5-10 sheets
- ● Disinfectant (e.g., rubbing alcohol) – small bottle
- ● Tree sealant (for extra protection) – 1 small bottle
- ● Zip ties (for securing small splits) – 5-10 ties
- ● Extension pole (for high branches) – 1 unit
- ● Ladder (if working above 6 feet) – 1 stable ladder
Step-by-step instructions for fixing a split tree branch
Here's how I repair splits safely—no special tools needed, just patience and the right technique.
✂️ Step 1: Assess and Stabilize the Split
First, examine the split carefully. Look for where the crack starts and ends—this tells you how deep the damage goes. If the split is fresh (less than a week old) and the two pieces still move slightly, you can often save the branch. But if it's jagged or the wood feels brittle, the branch may need removal instead.
Gently push the split apart to check for hidden rot or insect activity. Healthy wood should feel firm and slightly springy when pressed. If you see dark streaks or powdery frass (insect droppings), the branch is compromised and should be removed. For repairable splits, stabilize the pieces immediately by tying them together with 3/8-inch wide tree repair tape or a soft cloth strip. Don't use wire—it can cut into the bark.
🪴 Step 2: Clean and Prepare the Split
Use a clean, sharp knife or pruning shears to trim away any rough or torn edges where the split occurs. This creates a clean surface for the repair material to adhere to. Cut just enough to remove the jagged parts—you're not trying to reshape the branch, just smooth the edges so the repair stays put.
Wipe away any sap or debris with a damp cloth. If the split is deep and you can see the wood grain, lightly sand the area with fine-grit sandpaper (around 120-grit) to help the repair material grip better. This step is crucial—skipping it means the repair might fail when the branch moves in wind or rain.
💧 Step 3: Apply the Repair and Monitor
For small splits (under 1/4 inch wide), use a flexible tree repair epoxy or a high-quality tree wound dressing. Apply it directly to the cleaned split, pressing firmly to fill any gaps. For larger splits, wrap the area with tree repair tape after applying the epoxy. Overlap the tape by 1 inch on each side to ensure full coverage—think of it like wrapping a sprain.
Let the repair dry completely according to the product instructions (usually 24-48 hours). Avoid watering the area for at least 7 days to allow the repair to fully bond. Watch the branch for the next few weeks—if it starts to split again or the repair cracks, the branch may need professional removal. Healthy repairs will blend into the bark over time, looking like a natural part of the tree.
Tips & tricks for stronger tree branch repairs
Here's what I've learned after fixing splits in my own yard—and how to avoid the mistakes I made early on.
Timing is Everything: If you're working with a fresh split (less than a week old), act fast! The longer you wait, the more the wood dries out and becomes brittle. I once waited too long on a young oak branch, and even after repairing it, the split reopened during a storm. The key is to stabilize it immediately with that 3/8-inch wide tape—don't let the pieces move at all before applying the repair material.
The Right Tools Make All the Difference: Skip the wire—it's a common mistake that can actually damage the bark further. I used wire on my first repair and ended up with deeper cuts that took months to heal. Instead, use soft cloth strips or the tree repair tape mentioned in Step 1. For sanding in Step 2, a 120-grit sandpaper is perfect—it's coarse enough to grip the repair material but gentle enough not to damage healthy wood.
Don't Skip the Sanding: This is where most repairs fail. I learned this the hard way when a repair I did on a maple branch cracked after just two weeks. The split was deep, and without sanding the wood grain, the epoxy couldn't properly adhere. Take your time here—lightly sanding the exposed grain creates tiny grooves that help the repair material lock in place. A damp cloth afterward removes any dust that could weaken the bond.
Monitoring After Repair: The 24-48 hour drying time is just the beginning. I always mark the repair date on my calendar and check the branch weekly for the first month. If you notice the tape loosening or the repair cracking, don't panic—just reapply a fresh layer of epoxy and tape. The key is consistency: avoid watering the area for at least 7 days, and keep an eye out for any new splits forming nearby. Healthy repairs should look seamless after a few months.
Pro Tips for Fix A Split Tree Branch
- Here's what I've learned after fixing splits in my own yard—and how to avoid the mistakes I made early on.
- Timing is Everything: If you're working with a fresh split (less than a week old), act fast! The longer you wait, the...
- The Right Tools Make All the Difference: Skip the wire—it's a common mistake that can actually damage the bark furthe...
Frequently asked questions
Got questions about fixing a split tree branch? You’re not alone—here are some of the most common concerns and straightforward answers to help you tackle the job with confidence.
How do I know if a split branch needs immediate repair?
A split branch should be repaired if it’s still attached to the tree (even if dangling) or if it poses a safety hazard. Look for signs like exposed wood, sharp edges, or dead/dying foliage. If it’s unstable or could fall during storms, act fast! For branches that are completely detached, remove them to prevent pests or disease from spreading.
Can I fix a split branch without cutting it down?
If the branch is still structurally sound (just cracked or split), you can splice or brace it using methods like tree repair clips, screws, or epoxy. Avoid cutting unless the split is too severe—pruning should be a last resort for safety risks. Pro tip: If the split is near a major junction, consult an arborist to avoid weakening the tree further.
What’s the best time of year to repair a split tree branch?
The ideal time is late fall or early winter (dormant season) when trees aren’t actively growing. However, if the split is a safety hazard (e.g., near a house or power line), fix it immediately—regardless of the season. Avoid heavy pruning in summer heat, as it stresses the tree.
Will fixing a split branch kill my tree?
Not if done correctly! A proper repair won’t harm the tree—in fact, it can save it by preventing disease or further damage. Use sterilized tools and avoid over-tightening screws or clips, which can girdle the branch. If the split is deep or the tree is already stressed (e.g., from drought or pests), recovery may take longer. Monitor for signs of stress like yellowing leaves or oozing sap.
What if the split branch keeps splitting back?
Repeated splits often signal underlying weakness, like decay, poor growth structure, or fungal infections. If this happens:
- Assess the tree’s health: Check for hollow spots, mushrooms at the base, or dead branches.
- Prune strategically: Remove the split branch entirely if it’s too damaged to repair.
- Strengthen the tree: Add tree supports or improve soil health with mulch and fertilizer.
Are there alternatives to traditional repair methods?
Yes! Besides screws, clips, or epoxy, try these:
- Burlap or rubber wraps: Temporarily stabilize small splits (replace every 6–12 months).
- Natural callusing: For minor splits, let the tree’s natural healing process take over—just protect the area from pests.
- Cable systems: For large, high-risk branches, arborists use cables and turnbuckles to redistribute weight.
Wrapping up and next steps
Fixing a split tree branch doesn’t have to be daunting—with the right tools and techniques, you can restore your tree’s strength and safety in no time! 🌳✨ Remember, proper pruning promotes healthier growth and prevents future hazards.
Now that you’re equipped with the knowledge, grab your tools and get ready to give your tree the care it deserves.
For even more expert tips, check out our guide on tree maintenance to keep your yard thriving year-round!