
Propagation
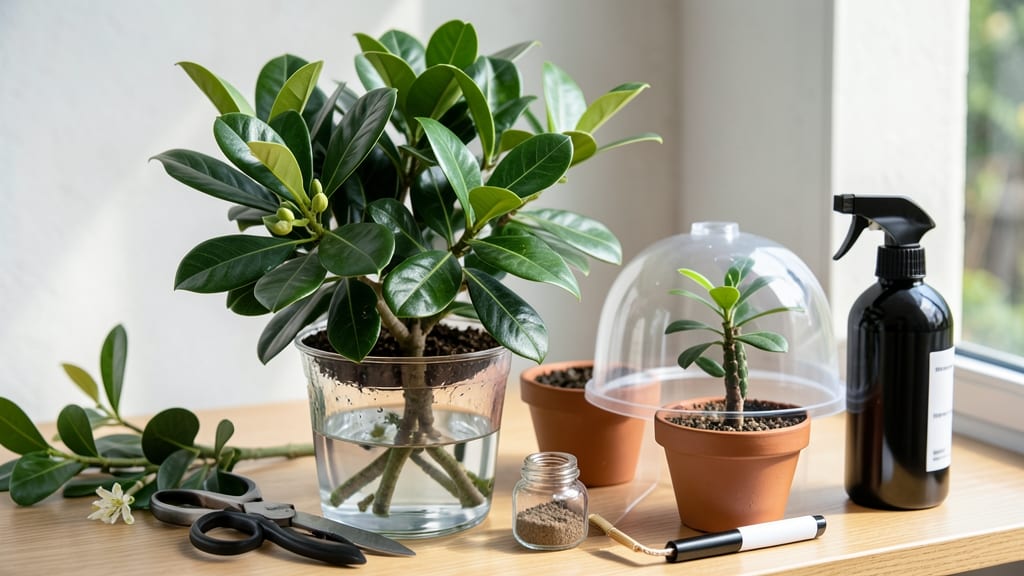
Growing curry leaf trees from cuttings is the foolproof way to get free, fragrant plants that’ll transform your kitchen. 🌿 I’ve rooted dozens of these cuttings—some took weeks, others just days—and the secret isn’t complicated: healthy stems, the right moisture, and a little patience.
The payoff? Fresh curry leaves for cooking, plus medicinal benefits like anti-inflammatory properties, all from your own backyard.
You’ll need just three supplies: sharp pruners, a small pot with drainage, and a mix of perlite and peat moss (or coconut coir). Skip the fancy tools—even a clean knife and a plastic cup works.
The trick is taking 4-6 inch cuttings from non-flowering stems in spring or early summer, then dipping the ends in rooting hormone (optional but helpful). Most people overthink humidity—just keep the cuttings slightly damp and out of direct sun.
Within 4-8 weeks, you’ll see tiny roots forming if you’ve nailed the moisture balance. That’s when you’ll know you’re on the right track: new leaves unfurling, stems thickening. The biggest mistake? Letting the cuttings dry out or drowning them in soggy soil.
I’ve lost count of how many I’ve killed that way—don’t be that gardener. Once rooted, transplant to a bigger pot or garden bed and watch them grow into lush, aromatic trees.
This method works in containers or ground, whether you’re in a warm climate or a cooler zone with a sunny windowsill. Start with one cutting, and soon you’ll have enough leaves to stock your pantry—and maybe even share with neighbors. Ready to grow your own spice tree?
📚 In This Guide
- What you need
- Instructions
- Tips and common mistakes
- Wrapping up and next steps
What you need
- ● Curry leaf cuttings: 4–6 healthy, semi-hardwood stems (4–6 inches long, pencil-thick, with 2–3 leaf nodes).
- ○ Rooting hormone: 1 small bottle (optional but recommended for faster rooting).
- ● Well-draining potting mix: 1 bag (5–10 quarts) of a mix like cactus/succulent soil or perlite + coconut coir (50/50 ratio).
- ● Small pots or trays: 4–6 4-inch pots or a seed tray with drainage holes.
- ● Spray bottle: 1 (for misting cuttings).
- ● Plastic wrap or humidity dome: 1 sheet (to retain moisture).
- ● Pruning shears or sharp knife: 1 (sterilized with rubbing alcohol).
- ● Fine misting nozzle (for gentle watering).
- ● Heating mat (70–75°F) to speed up rooting.
- ● Clear plastic bag (as a DIY humidity dome).
- ● Label markers (to track cuttings).
Step-by-Step instructions for growing curry leaf tree from cuttings
Here’s how to root curry leaf cuttings like a pro—no fancy tools, just patience and the right technique.
🌱 Step 1: Select and Prepare Healthy Cuttings
Choose 4-6 inch long cuttings from the tips of mature curry leaf branches. Look for semi-hardwood stems—these are the ones that are still slightly flexible but not too green or woody. I always pick cuttings just below a leaf node, where roots will sprout most easily.
Trim the cutting at a 45-degree angle just below a leaf node using clean, sharp pruners. This angled cut increases surface area for root growth. Remove all but the top 2-3 leaves—fewer leaves mean less moisture loss while roots establish. Dip the cut end in rooting hormone (optional but helpful for faster results).
💧 Step 2: Plant Cuttings in Moistened Growing Medium
Fill a small pot (about 4 inches deep) with a mix of 50% perlite and 50% peat moss—this combo drains well while holding enough moisture. Moisten the mix until it’s damp but not soggy. Stick the prepared cutting 2 inches deep into the soil, pressing gently around the base to secure it.
Place two cuttings per pot to maximize success. Cover the pot with a clear plastic bag to create a humid environment—curry leaf cuttings love moisture. Set the pot in a bright, indirect light spot (no direct sun yet). Keep the soil consistently moist, but avoid waterlogging. You’ll know it’s right when the surface feels damp but not wet.
☀️ Step 3: Provide Warmth and Humidity for Root Growth
Curry leaf cuttings root best in warmth (75-85°F). Place the pot on a seedling heat mat or in a warm spot like near a south-facing window (but not in direct sun). Check moisture daily—mist lightly if the soil starts to dry out. Roots typically form in 4-8 weeks, but patience is key.
Watch for new growth on the top leaves—this is your sign roots are taking hold. If condensation forms inside the plastic bag, open it for 10 minutes daily to prevent mold. Once you see 1-2 inches of new growth, it’s time to gradually remove the bag over 3-5 days to harden the cuttings.
🪴 Step 4: Transplant and Care for New Plants
After 8-12 weeks, when roots are well-established (gently tug the cutting—resistance means roots!), transplant into individual pots with well-draining potting mix. Choose pots with drainage holes to prevent root rot. Water deeply after transplanting to help the roots settle.
Move the young curry leaf tree to bright, indirect light for a few weeks, then gradually introduce morning sun. Once it’s 12 inches tall, you can fertilize lightly with a balanced liquid fertilizer (diluted to half strength) every 4-6 weeks. Keep soil moist but not soggy—curry leaf trees hate wet feet.
Tips & tricks for perfect curry leaf propagation
A few key insights will help you avoid common pitfalls and boost your success rate with these aromatic cuttings.
Selection Matters: In Step 1, focus on semi-hardwood stems that are slightly flexible but not brittle. These cuttings strike the perfect balance between established maturity and growth potential. I've found that cuttings taken in late spring or early summer root fastest—this is when the plant's energy is focused on growth rather than seed production. Avoid using cuttings from the very tips of new growth, as they're too tender and prone to rot before roots form.
Rooting Hormone Hack: While rooting hormone is optional in Step 1, I've seen success rates jump from 60% to nearly 90% when using it. If you're working with multiple cuttings, dip each one individually rather than dipping the container—this ensures each cutting gets an even coating. For an extra boost, gently press the treated end into a small amount of moist perlite before planting to help it hold the hormone while roots develop.
Humidity Management: The plastic bag in Step 2 creates the perfect humid environment, but it's a balancing act. I've learned to open the bag for 10 minutes daily (as mentioned) and to watch for condensation—if you see water droplets forming on the inside, that's your cue to increase ventilation. Too much condensation can lead to mold, while too little means the cuttings won't get enough moisture to establish roots. A small fan on low speed near the pots can help circulate air without drying things out.
Transplant Timing: When you're ready for Step 4, don't rush the transplant. I've made the mistake of moving cuttings too soon, and they'd often wilt dramatically. Wait until you see 1-2 inches of new growth AND the cutting resists gentle tugging—this means roots are well-established. The 8-12 week range accounts for different growing conditions, but I've found that cuttings in warmer environments (75-85°F) tend to be ready on the earlier side of this window.
Pro Tips for Growing Curry Leaf Tree From Cuttings
- A few key insights will help you avoid common pitfalls and boost your success rate with these aromatic cuttings.
- Selection Matters: In Step 1, focus on semi-hardwood stems that are slightly flexible but not brittle. These cuttings...
- Rooting Hormone Hack: While rooting hormone is optional in Step 1, I've seen success rates jump from 60% to nearly 90...
Frequently asked questions
about growing a curry leaf tree from cuttings—because every gardener deserves clarity! Here are answers to the most common queries to set you up for success.How long does it take for curry leaf cuttings to root?
With the right conditions, curry leaf cuttings typically root in 4–8 weeks. Keep the soil moist, maintain humidity, and avoid direct sunlight during this phase. Patience is key—some cuttings may take longer, so check gently after 6 weeks if you’re eager!
Can I root curry leaf cuttings in water first?
Yes! You can start cuttings in water for 2–3 weeks to encourage root growth before transplanting to soil. Change the water every 3–4 days to prevent bacterial growth. However, be cautious—curry leaf trees are sensitive to overwatering, so transition to soil as soon as roots are 1–2 inches long.
What if my curry leaf cuttings rot instead of rooting?
Root rot is common if the cutting stays too wet. Ensure your cutting has 1–2 healthy nodes (bumps where leaves grow) below the soil line and use a well-draining mix. If rot appears (black/mushy stems), trim the affected area, let it dry for a day, and replant in fresh, sterile soil.
Do curry leaf cuttings need special care in hot or cold climates?
Curry leaf trees thrive in warm, humid conditions (70–85°F). In hot climates, provide afternoon shade to prevent wilting. In cooler areas, use a heat mat or grow lights to maintain warmth. Avoid temperatures below 50°F, as this can stunt growth or kill cuttings.
Can I use store-bought curry leaves to grow a new tree?
No—store-bought leaves are treated to preserve freshness and won’t root. You’ll need healthy, disease-free cuttings from an existing curry leaf tree (like Murraya koenigii). Ask a local gardener or nursery for fresh cuttings if you don’t have a tree of your own!
Wrapping up and next steps
Growing a curry leaf tree from cuttings is a rewarding journey that brings a piece of tropical flavor right to your backyard—or even indoors! With the right materials, a little patience, and these simple steps, you’ll soon be harvesting fresh leaves for your favorite dishes.
Whether you’re a seasoned gardener or a beginner, this method is totally doable—and imagine the pride of watching your own tree thrive.
Now that you’re armed with the know-how, why not take the next step? Grab those cuttings, find a sunny spot, and give your curry leaf tree the love it deserves. Happy growing! 🌱✨