
Planting
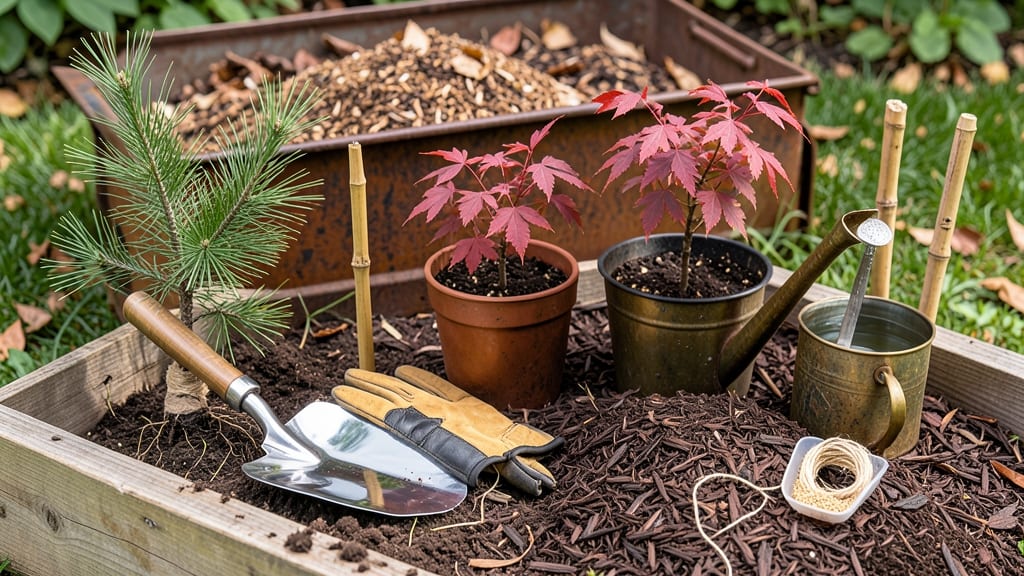
Planting tree seedlings isn't just about digging a hole—it's about giving roots the perfect foundation to spread out and thrive. 🌱 I learned the hard way that shallow planting or compacted soil can stunt growth for years, but the right technique turns fragile seedlings into sturdy trees within months.
The secret lies in layered soil that mimics natural conditions, encouraging roots to explore downward and outward.
Start with a hole twice as wide as the root ball but only as deep—planting too deep suffocates roots while shallow planting leaves them exposed. Loosen the sides of the hole with a shovel or hands, then mix in a handful of compost or aged manure to boost early growth.
For heavy clay soil, add a layer of coarse sand or perlite at the bottom to improve drainage without smothering roots.
Water deeply right after planting to settle the soil and eliminate air pockets, then create a 2-inch watering basin around the base to keep moisture consistent.
Mulch with 3-4 inches of organic material (straw or wood chips) to retain moisture and block weeds, but keep mulch 6 inches away from the trunk to prevent rot. Within 4-6 weeks, you'll see new root growth pushing through the soil surface—a sure sign your tree is establishing itself.
Different trees need different care: fruit trees benefit from a deep watering schedule (every 7-10 days), while ornamental trees often prefer shallow but frequent watering.
Avoid common mistakes like over-tightening the root ball or planting too close to structures—give young trees space to breathe (at least 10-15 feet from buildings or other plants). With these steps, your seedlings will grow into strong, independent trees in no time.
📚 In This Guide
- What you need
- Instructions
- Tips and common mistakes
- Wrapping up and next steps
What you need
- ● Tree Seedlings: 1–5 (depending on your space and goals—choose healthy, disease-free saplings with strong stems and roots).
- ● Shovel or Trenching Tool: A sturdy digging shovel (16–18 inches long) or a transplant spade for precision.
- ● Garden Gloves: A pair of durable, breathable gloves (e.g., leather or reinforced fabric) to protect your hands from thorns and dirt.
- ● Watering Can or Hose: A lightweight watering can (1–2 gallons) or a soaker hose for gentle hydration.
- ● Mulch: 2–3 inches of organic mulch (wood chips, straw, or pine needles) to retain moisture and suppress weeds.
- ● Compost or Fertilizer: Balanced, slow-release fertilizer (10-10-10 or organic options like worm castings) or compost to enrich the soil.
- ○ Staking Supplies (Optional): 2–3 bamboo stakes or metal rods (4–6 feet tall).
- ● Soft tree ties or garden twine to secure seedlings without damaging bark.
- ● Location: Choose a spot with full sun to partial shade (varies by tree species—check seedling tags!). Ensure it’s at least 10–20 feet away from structures, sidewalks, or other trees (root space matters!).
- ● Soil Test (Recommended): A DIY soil test kit (or lab test) to check pH and nutrient levels. Most trees thrive in slightly acidic to neutral soil (pH 6.0–7.5).
- ● Weather Check: Plant on a cool, cloudy day or in the early morning/late afternoon to reduce stress on seedlings.
- ● Permits (If Needed): Verify local regulations—some areas require permits for planting large trees near public spaces.
- ● 💡 Bring a wheelbarrow! Hauling mulch, soil, or tools is easier with one—just 1–2 cubic feet should do.
- ● 🔥 Label your seedlings. Use biodegradable plant markers to track varieties, especially if planting multiple types.
- ● 🌡️ Pre-soak bare-root seedlings. If your saplings have exposed roots, soak them in water for 1–2 hours before planting.
Step-by-Step instructions for planting tree seedlings
Here's how to give your young trees the best start—layered soil prep makes all the difference.
🌱 Step 1: Choose the Right Location and Dig the Hole
Select a spot with 6+ hours of sunlight daily and room for the tree to mature. Dig a hole twice as wide as the root ball but only as deep—planting too deep suffocates roots. I always step into the hole to check depth; my shoe sole should just touch the top of the root ball when placed inside.
Loosen the sides of the hole with a shovel to prevent soil compaction around roots. If your soil is heavy clay, add a handful of compost to the bottom to improve drainage. The goal is to mimic the tree's natural growing conditions as closely as possible.
🌿 Step 2: Prepare the Seedling for Planting
Remove the seedling from its container and gently loosen the root ball by teasing apart the outer roots with your fingers. If roots are circling tightly (a common nursery issue), make 2-3 vertical cuts around the perimeter to encourage outward growth. This prevents "girdling" as the tree matures.
Inspect the stem for any signs of damage or disease. If you spot brown or mushy areas, trim them away with clean pruners. Healthy seedlings have firm, white roots and no visible damage. Give the root ball a quick soak in lukewarm water for 10-15 minutes before planting to settle the soil and reduce transplant shock.
💧 Step 3: Layer the Soil for Optimal Root Growth
Backfill the hole in 3-inch layers, tamping down each layer lightly with your foot. This creates a firm foundation while preventing air pockets. I like to mix the native soil with 1 part compost for every 3 parts soil—this boosts nutrient availability without overwhelming the seedling.
Stop filling when the top of the root ball sits 1 inch below soil level. Water deeply to settle the soil and eliminate air gaps. The soil should feel moist 6 inches down—if it's dry, water again. This layered approach prevents root desiccation and encourages strong downward growth.
☀️ Step 4: Mulch and Water for Long-Term Stability
Spread 2-3 inches of mulch around the base, keeping it 6 inches away from the trunk to prevent rot. I use wood chips because they break down slowly, improving soil structure over time. Mulch helps retain moisture and regulates soil temperature—critical for young trees in hot or cold climates.
Water thoroughly after mulching, then monitor soil moisture weekly. Seedlings need 1-2 inches of water per week, but check the top inch of soil first—if it's dry, water again. Avoid overhead sprinkling; instead, use a soaker hose or water at the base to prevent fungal diseases.
✂️ Step 5: Stake Only When Necessary
Only stake if your tree is 6 feet tall or taller or in a windy location. Use two stakes on opposite sides, tied loosely with soft fabric strips. Tighten the ties as the tree grows, but never restrict movement—you want the tree to develop strength through natural swaying.
Remove stakes after 1 year or when the tree can stand upright without support. I've seen too many trees with permanent stakes that girdle the trunk as they grow. If you must stake, place the ties 6 inches above the soil line to avoid bark damage.
Tips & tricks for planting tree seedlings
Real talk: The difference between a thriving tree and one that struggles starts with these foundational tricks—most gardeners miss them entirely.
Root Ball Inspection: Before planting, look for any roots circling tightly around the root ball. These "girdling roots" can strangle your tree as it grows. If you see them, make 2-3 vertical cuts around the perimeter with clean pruners—this encourages outward growth. I've seen too many trees fail because this critical step was skipped. The 10-15 minute lukewarm water soak in Step 2 also helps reveal any hidden damage you might miss at first glance.
Soil Layering Technique: That 3-inch layer backfill in Step 3 isn't just arbitrary—it creates the perfect balance between firmness and aeration. When tamping down each layer, imagine you're gently compressing a sponge. Too little pressure leaves air pockets that suffocate roots; too much creates compaction that restricts growth. The 1-inch depth check ensures proper drainage while keeping the root ball stable. Pro tip: Use a garden trowel to check moisture 6 inches down after watering—this is your best indicator of proper hydration.
Mulch Placement Precision: The 2-3 inch mulch layer in Step 4 isn't just about moisture retention—it's about creating a microclimate. Keep that mulch 6 inches away from the trunk to prevent rot and pest issues. I've noticed that wood chips work best because they break down slowly, adding organic matter over time. For the first watering after mulching, aim for 1-2 inches of water penetration—this ensures the roots establish properly in their new home.
Staking Strategy: Only stake trees taller than 6 feet or in windy conditions, as mentioned in Step 5. When you do stake, use soft fabric ties (never wire) placed 6 inches above soil level. The key is to allow natural movement—trees develop strength through gentle swaying. I've seen many gardeners leave stakes in too long, creating permanent damage. Set a reminder to check stakes after 1 year or when the tree can stand alone.
Pro Tips for Plant Tree Seedlings
- Real talk: The difference between a thriving tree and one that struggles starts with these foundational tricks—most g...
- Root Ball Inspection: Before planting, look for any roots circling tightly around the root ball. These "girdling root...
- Soil Layering Technique: That 3-inch layer backfill in Step 3 isn't just arbitrary—it creates the perfect balance bet...
Frequently asked questions
Got questions about planting tree seedlings? You’re not alone! Here are answers to the most common queries to help you grow confidently—whether you're a first-time gardener or a seasoned green thumb.
When is the best time to plant tree seedlings?
The ideal window is early spring or fall when soil is workable but not frozen. Avoid planting in extreme heat or drought—seedlings need moisture to establish roots. In warmer climates, late fall to winter can also work, as cooler temps reduce stress. Always check your local frost dates!
How often should I water newly planted seedlings?
Water deeply 2-3 times per week for the first month, ensuring the soil stays consistently moist (not soggy). After that, taper to once a week, adjusting for rain. Mulch helps retain moisture—apply a 2-3 inch layer around the base (keep it away from the trunk to prevent rot).
Can I plant seedlings in containers instead of the ground?
Use large pots (at least 5-gallon size) with drainage holes and well-draining soil. Containers work well for urban gardens or small spaces, but transplant to the ground within 1-2 years—roots need room to grow. Choose fast-draining mixes (like 60% soil, 30% compost, 10% perlite) to prevent waterlogging.
What should I do if my seedling’s leaves turn yellow?
Yellow leaves often signal overwatering, underwatering, or nutrient deficiency. Check the soil: if it’s muddy or dry, adjust your watering. For nutrient issues, add a balanced fertilizer (like 10-10-10) every 4-6 weeks. Lower leaves yellowing is normal as the tree matures, but upper leaves? Act fast!
How close can I plant seedlings to my house or fence?
Keep seedlings at least 3-5 feet away from structures to avoid root conflicts with foundations or septic systems. For mature trees, aim for 10-15 feet—roots can spread 2-3 times the tree’s height. Always check local guidelines, especially in HOAs or urban areas where restrictions may apply.
Still stumped? Drop your question in the comments—we’re happy to help your seedlings thrive!
Wrapping up and next steps
Planting tree seedlings is a rewarding way to nurture growth and contribute to a greener planet! 🌱 By following the layered soil technique and paying attention to spacing, watering, and care, you’ll give your young trees the best start.
Remember, patience and consistency are key—your efforts today will yield shade, beauty, and even wildlife support for years to come.
Now that you’re armed with the know-how, take the next step: mark your planting spots, gather your tools, and get those seedlings in the ground! Whether you’re a beginner or a seasoned gardener, every tree makes a difference. Happy planting! 🌳✨